How to Interpret Trail Junction Symbols on Printed Maps
You’ll see trail junctions on printed topo maps as bold black “T” or “Y” shapes, often labeled with trail numbers like Trail 207, matching actual blazes-red, blue, or yellow-on trees or rocks. Check the map’s legend for blaze color codes and trail symbols, especially on USGS 1:24,000-scale maps where contour lines show steep climbs or saddles at junctions. Use nearby peaks, streams, or elevation from index contours to confirm your spot. Align your approach direction and recent terrain with the map, then verify the correct trail by matching blaze color and GPS or altimeter data-next steps reveal how terrain and landmarks guide smarter route choices.
We are supported by our audience. When you purchase through links on our site, we may earn an affiliate commission, at no extra cost for you. Learn more. Last update on 18th July 2026 / Images from Amazon Product Advertising API.
Notable Insights
- Look for bold black “T” or “Y” shapes on USGS maps, which indicate trail junctions at 1:24,000 scale.
- Check the map legend for junction symbols like forked or crossed lines to confirm interpretation standards.
- Match trail numbers (e.g., Trail 207) labeled at junctions to verify specific route identities.
- Use contour lines-U-shaped patterns downhill or V-shaped uphill-to identify ridges or valleys where trails meet.
- Confirm location using nearby landmarks like peaks, streams, or shelters within 0.2 miles of the junction.
Spot Trail Junction Symbols on Maps
When you’re planning a ride or hike, knowing how to spot trail junction symbols on maps can save you time and keep you on course, especially in dense backcountry areas where trails split without obvious signage. On topo maps in the United States, the U.S. Geological Survey uses a bold black line or tic mark crossing a trail to signal junctions-look for that “T” or “Y” shape. These symbols appear clearly at 1:24,000 scale, often labeled with trail numbers like “Trail 207” for easy ID. Always check the map legend: junction icons, usually a forked line or cross, clarify trail marking standards. While contour lines reveal terrain, junction details boost your map and compass navigation confidence. Good trail maps, like Green Trails editions, add mileage or elevation near junctions, refining your route choices. Strong navigation skills mean trusting map details over faint trail signage. With reliable topo maps in hand, you’ll ride or hike smarter, avoiding wrong turns when trail marking fades or vanishes.
Match Blaze Colors to Map Trails
Though topo lines and junction markers guide your overall route, matching blaze colors to map trails keeps you on the right path where signage is sparse or confusing. Your trail map should show coded lines-like red, blue, or yellow-that match the actual trail markers you’ll see on trees or rocks. Always check the blaze color-to-trail legend first, since trail blaze colors vary by region and agency. For example, on the Appalachian Trail, white blazes mark the main route and blue blazes signal side trails, a standard clearly shown on National Geographic and Forest Service maps. Not all maps, like basic USGS versions, include this detail, so choose specialty maps that guide hikers with accurate color coding. At a trail junction where colors shift, follow the correct sequence. Matching blaze colors to map trails guarantees you stay on course, especially when trail markers fade or split.
Use Contour Lines to Read Junction Terrain
Blaze colors keep you on the right path, but reading contour lines gives you the full story of what’s ahead at a trail junction. When contour lines form a U-shape pointing downhill, you’re near a ridge-a common spot for junctions due to stable, connected terrain. Tightly spaced contour lines mean steep terrain, warning you of tough climbs or descents. If you see a saddle or pass between two concentric circles, that’s a low-elevation link between summits, often where trails converge. V-shaped contour lines pointing uphill mark a drainage or valley, and junctions here often serve water access or avoid rugged slopes. Index contour lines, labeled with elevation, let you calculate exact elevation changes-say, 100 feet in 0.3 miles-so you can choose routes wisely and conserve energy.
Find Nearby Landmarks to Confirm Your Location
How do you know you’re really at the junction marked on your map? Use nearby landmarks to confirm. Check your topo map for prominent terrain features-peaks, lakes, or ridgelines-and see if they match what you see around you. Closely spaced contour lines indicate steep slopes, which often align with cliffs or ridges near junctions. Verify the elevation using your GPS or altimeter, comparing it to the map’s index contour lines, labeled every fifth line. Blue-line streams are reliable markers; if you’ve crossed one, check its position and flow direction against the map. Human-made features like footbridges, campsite icons, or trail shelters within 0.2 miles can also pin your location. These details, combined with accurate elevation and terrain shape, give you confidence you’re exactly where you think you are.
Check Your Approach Direction at Junctions
As you close in on a trail junction, making sure you’ve approached from the right direction keeps you on track and avoids costly detours. Confirm your approach direction by aligning the map orientation with your path, matching the trail routing you just traveled. Use visible topographic features-like a ridgeline or creek-to verify your position. Check contour lines to compare the elevation profile with the terrain you’ve climbed or descended. Guarantee the blaze color you followed matches the trail markers on the map and consult the map legend for accuracy.
| Feature | Match on Map & Ground |
|---|---|
| Trail angle | Consistent with recent routing |
| Contour lines | Match ascent/descent pattern |
| Blaze color | Matches legend symbol |
| Nearby peak | Visible and correctly positioned |
| Stream flow | Direction aligns with topography |
Verify the Correct Trail Before Continuing
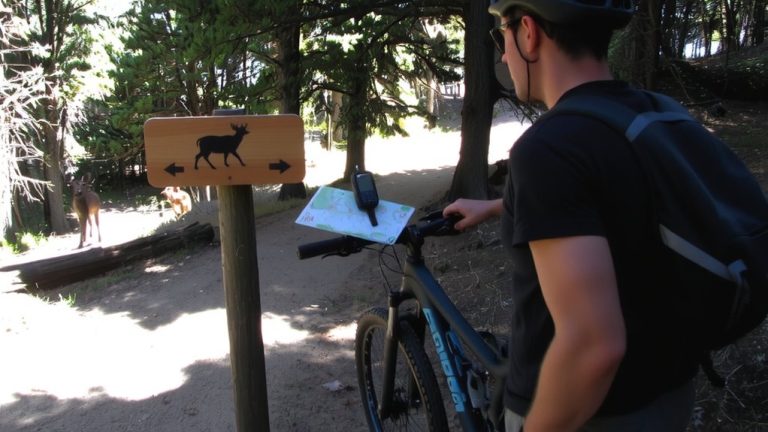
When you’re standing at a junction, double-checking the trail you’re about to take could save you hours of backtracking, so don’t rely on memory-verify blaze color, symbol, and trail number against your map and the physical markers on trees or posts ahead. Read your Map’s legend to confirm what each symbol means, like a tent or water drop, and use that to match junction signs with your intended route. Cross-reference the Trail name and number on maps with posted labels, especially in dense networks where paths overlap. Check for an arrow, especially a right-pointing one, or offset markers that signal upcoming turns. Use your compass to confirm direction matches the trail’s bearing. Good navigation means trusting verified markers every 50 to 200 feet, not guesswork. Your map, compass, and attentiveness keep you on the right path-every time.
On a final note
You’ve got this-just match those blaze colors to your map, check contour lines for steep turns, and use nearby landmarks to stay sure. Approach junctions slow, verify your trail, and keep moving confidently. Tested riders prefer 26mm tires for grip, and breathable backpacks with 20L capacity haul gear without drag. Real trails reward prep: durable boots, clear maps, and sharp eyes beat fancy gadgets every time.