How to Find Mountain Bike Trails With Overlook Points for Scenic Breaks
Use MTB Project and Trailforks to find trails with “scenic” tags or geotagged viewpoints, like the Tahoe Rim Trail’s 3,000-foot climb offering panoramic lake views, or Whistler’s Top of the World Trail at 7,136 feet for 360-degree alpine vistas. Focus on routes with 1,000+ feet of elevation gain, check for permits or closures, talk to locals for hidden spots, and preview YouTube head-cam videos to see the views firsthand-there’s more where that came from.
We are supported by our audience. When you purchase through links on our site, we may earn an affiliate commission, at no extra cost for you. Learn more. Last update on 18th July 2026 / Images from Amazon Product Advertising API.
Notable Insights
- Use trail apps like MTB Project and Trailforks to filter routes with “scenic” tags and GPS-marked viewpoints.
- Seek trails with 1,000+ feet of elevation gain, which commonly lead to panoramic natural overlooks.
- Check for seasonal closures, permits, or timed entry requirements before accessing trails like Tahoe Rim or Moab routes.
- Consult local bike shops or guides for hidden overlooks not listed on official maps or apps.
- Watch YouTube head-cam videos to preview viewpoints on technical descents or remote alpine trails.
Start With Trail Apps That Show Scenic Viewpoints
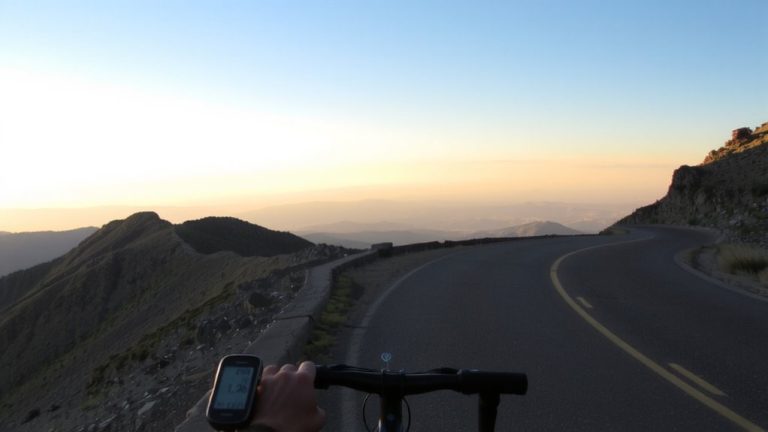
If you’re after mountain bike trails with jaw-dropping overlooks, start by tapping into trail apps that highlight scenic viewpoints right on the map. Apps like MTB Project and Trailforks make it easy, using GPS data and user photos to flag trails with scenic overlooks. MTB Project’s “scenic” filter helps you find routes like the Tahoe Rim Trail, famous for panoramic lake views. Trailforks marks designated viewpoints on downloadable, offline maps-super helpful on remote rides like the Monarch Crest Trail. Riders using Trailforks have geotagged 360-degree vistas at Squamish’s Alice Lake trails, so you won’t miss the best photo spots. High-altitude sections, such as Whistler’s Top of the World Trail at 7,136 feet, show up clearly on elevation profiles. With trail apps, you’re not guessing-you’re proceeding straight to views backed by real rider data, detailed tags, and reliable maps that sync your ride from start to summit.
Use Elevation Gains to Find Natural Overlooks
While not every climb guarantees a view, trails with sustained elevation gains of 1,000 feet or more, like the Wasatch Crest Trail’s 1,800-foot ascent, often lead to natural overlooks that are worth the effort, especially when your climbing gear includes a lightweight dropper post and grippy 2.4-inch all-mountain tires for efficient switchback handling. When you’re Mountain Biking, those elevation gains typically reward you with panoramic overlook points-think Monarch Crest Trail’s 2,000+ feet climb revealing 14,000-foot peaks, or Tahoe Rim’s 3,000-foot rise opening to Lake Tahoe’s glittering blue. Even Squamish’s Jacks or 50 Shades of Green delivers cliffside scenic breaks above Howe Sound. Whistler’s Top of the World Trail, hit after a 4,500-foot lift, offers 360-degree alpine views. Steady elevation gains usually mean fewer trees, wider skies, and real payoff-perfect for pausing, breathing deep, and taking in the ride.
Check Trail Status and Permits First
You’ll want to double-check trail access before you roll out, since even the most rewarding scenic overlook routes can close without notice due to weather, fire risk, or ongoing maintenance-like the Tahoe Rim Trail, where snowmelt delays or storm damage often shutter sections into early summer. Always verify the latest status on apps like Trailforks or MTB Project, and check with local ranger stations for real-time updates. Some trails, like Upper Porcupine in Moab or routes in Grand Targhee Bike Park, require permits or timed entry, especially during peak fall season. Backcountry rides such as Monarch Crest Trail may need day-use or bikepacking permits, while areas near Sedona or St. George often enforce guided-access rules under federal regulations. Don’t assume you can ride freely-ignoring permit requirements or closures risks fines and unsafe detours. Planning ahead guarantees you stay legal, safe, and focused on the views, not red tape.
Ask Locals About Hidden View Spots
Where do you find the best views that don’t show up on trail maps? Ask locals-they know the hidden view spots you won’t find on apps. Stop by bike shops in Squamish, and staff might point you to a quiet overlook on 50 Shades of Green before the drop into Of Mice & Men. In Whistler, locals suggest a quick pull-off near the Top of the World Trail lift access for 360-degree snowy peak views. Moab guides like Chris from Advenduro Tours often send riders to Klondike Bluffs for panoramic red rock scenery. Tahoe’s Flume Trail delivers scenic breaks along limestone cliffs above Incline Village, while Sedona’s Hiline has low-exposure overlooks locals quietly share. These insiders give real trail context, helping you plan stops that fit your pace, pack size, and ride goals-turning good rides into memorable ones.
Watch YouTube Rides to See the View Yourself
How do you know which trail delivers that heart-stopping view without gambling on a long ride? You watch YouTube rides to see the view yourself. Strap in virtually with head-cam footage from channels like SingletrackSkills, where real riders tackle scenic trails like Sedona’s Hangover or Moab’s The Whole Enchilada, pausing at overlooks that take your breath away. Search full-run videos of the Flume Trail in Lake Tahoe or Top of the World in Whistler to preview 360-degree summit views on black diamond descents. These videos show exactly when and where riders stop, giving you a real feel for the riding experience. Filter by location tags-like “McKenzie River Trail Oregon”-or check BC Bike Race uploads to scout vista points in Squamish, B.C. It’s an easy way to pick your next mountain biking destination and pack your bike pack right.
Look for Trails Marked With Benches or View Platforms
A well-placed bench or purpose-built view platform can be your best clue that a trail delivers on scenery without sacrificing flow. On the Flume Trail in Lake Tahoe, wooden platforms appear every 1.5 miles, offering framed views of turquoise water-perfect after sustained climbs. At Whistler’s Bike Park, the High Note Trail features three engineered platforms with metal railings and interpretive signs, perched above 5,000 feet for panoramic mountain vistas. You’ll find similar thoughtfulness on downhill trails like Leave of Absence in Squamish, where a steel cantilever extends over the Stawamus River canyon, safe and stable mid-descent. Custom cedar benches on Oregon’s McKenzie River Trail, near Tamolitch Falls, cater to all skill levels, as do Northstar California’s Gypsy Trail rest spots with back support and open meadow views. These markers aren’t just comfort-they’re proof the route balances challenge with scenery, ideal for riders packing light trail snacks and a compact hydration pack.
On a final note
You’ll ride smarter with the right tools: GAIA GPS pinpoints scenic trails, while trails gaining 1,000+ feet often deliver natural overlooks. Check AllTrails for recent updates and permit needs-Deer Creek Falls requires a $5 day pass. Locals know hidden benches, like those on Skyline Trail near mile 3.2. Watch YouTube riders’ POV footage to preview views. Trails marked with wooden platforms, like at Sunset Ridge, guarantee safe, stable photo stops, every time.