Using Compass Bearings to Navigate When GPS Fails
When GPS fails, your compass keeps you on track-no batteries, no signal needed. Adjust for declination, like 10° east, to avoid drifting 1,750 feet off per mile. Use a Suunto M-3 or Silva Ranger to take bearings: align edge with your route, turn bezel to match map grid, then follow “red in the shed.” In fog, pair compass bearings with slope aspect every 10–15 minutes. With triangulation from three landmarks, you’ll pinpoint your spot-just like backcountry testers did in the Rockies. There’s more where that came from.
We are supported by our audience. When you purchase through links on our site, we may earn an affiliate commission, at no extra cost for you. Learn more. Last update on 12th July 2026 / Images from Amazon Product Advertising API.
Notable Insights
- A compass works without batteries or signal, making it reliable when GPS fails due to dead power or poor reception.
- Adjust for magnetic declination to align compass readings with true north and avoid significant navigation errors.
- Take a bearing from the map by aligning the compass edge with your route and rotating the bezel to match grid lines.
- Use triangulation with three distant, visible landmarks to pinpoint your location when GPS is unavailable.
- In fog, navigate using slope aspect and linear terrain features matched with compass bearings to stay on course.
Why You Need a Compass When GPS Fails
Even if your GPS unit has served you well on every trail ride or backcountry trek, it’s only as reliable as its battery life or satellite signal, and when it quits-whether from a dead battery, dense tree cover, or solar interference-you’ll wish you had a trusted magnetic compass on your belt loop. A compass doesn’t rely on Wi-Fi or power, just Earth’s stable magnetic field, making it essential when smartphones fail. Using a compass, you can find your bearing even during solar flares or EMPs. The red magnetic needle always points to magnetic north, not true north and magnetic north differ, so ignoring declination can put you 3 miles off on a 10-mile navigation course. Keep metal objects away-zippers, bikes, or gear can disrupt accuracy. Survivors in Katrina and wildfires used map and compass to escape. The military trains all soldiers in map and compass skills-so should you.
Set up Your Compass With Declination
Since magnetic north and true north don’t line up, you’ll need to adjust for the 10-degree easterly declination in your area, or you’ll end up 1,750 feet off course for every mile you travel. To set up your compass, first find the declination value for your location-here, it’s 10 degrees east. If you’re using a compass with adjustable declination, use the rotating bezel to adjust declination so the orienting arrow inside shifts accordingly. This aligns magnetic north with true north on your map, closing the gap between north and magnetic north. The difference between true north and where your needle points matters, so don’t skip this step. When properly adjusted, your compass gives true-north bearings without mental math. For maximum accuracy, match your GPS to true north and rely on the compass to reflect the same. It’s a small tweak that keeps your route on target, mile after mile.
Take a Compass Bearing From Map to Field
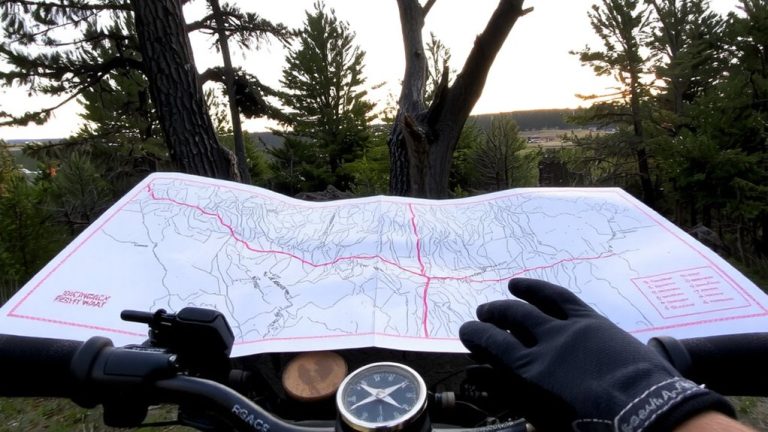
Once you’ve adjusted for declination, you’re ready to take a bearing from your map to the field, and doing it right means staying on track even when the trail fades. First, identify your current position and destination on the map and take a bearing by placing the compass edge between them, with the direction-of-travel arrow pointing forward. Draw a line along the edge to confirm alignment. Rotate the bezel so the orienting lines align with the map’s north-south grid and the orienting arrow points to true north. Now, lift the compass, hold it level, and rotate your body until the red magnetic needle aligns with the orienting arrow-“red in the shed.” The compass bearing is set. Follow the direction-of-travel arrow, sighting distant landmarks to stay accurate over 100–200 yards.
Pinpoint Your Location With Triangulation
When you’re out on the trail and need to find exactly where you are, triangulation’s your go-to method, especially if GPS cuts out or the terrain gets confusing. With your compass, take bearings to three visible landmarks marked on your topographic map-spaced about 120 degrees apart for best results. For each, point the direction of travel arrow at the landmark, turn the bezel until the red magnetic needle sits in the shed, then read the bearing at the index line. Don’t forget to correct for 10° east magnetic declination so your bearing aligns with true north. Plot each adjusted bearing as a line from the landmark back across the map. Where all three lines intersect, that’s your spot. The more distant and distinct the landmark, the tighter your fix. Triangulation works best in clear terrain, but pair it with slope or linear features when visibility drops.
Navigate in Fog Using Slope and Compass
Even if you can’t see more than 50 yards ahead, you can still stay on course by combining slope aspect and compass bearings to confirm your position and direction. Using your map, identify the expected slope aspect, then hold your compass flat in front and take a bearing perpendicular to the contours. When the arrow points downhill along the fall line, compare it to the map-this helps confirm your current location. Also, use your compass to take bearings along linear features like ridges. Taking readings every 10–15 minutes guarantees accuracy in shifting terrain.
| Method | Tool Used | Purpose |
|---|---|---|
| Slope aspect | Compass flat in front | Confirm terrain direction |
| Linear feature | Arrow points along ridge | Match to map orientation |
| Cross-checking | Use your compass + map | Pinpoint current location |
Practice Compass Bearings in Your Local Park
While you might not need survival-level navigation in your local park, practicing precise compass bearings sharpens skills you’ll rely on when trails vanish or weather turns, and it’s easier than you think to build confidence with just a few field exercises. Head to your local park with a baseplate compass and practice compass bearings by taking a bearing of 45 degrees, holding the compass level with the travel arrow pointing away. Rotate your body until red is in the shed, then walk 100 yards. Recheck your bearing every 100–200 yards by sighting a landmark to reduce errors. To return to your starting point, take a bearing of 225 degrees and repeat the process. Use a USGS map to align your baseplate compass between landmarks, ensuring orienting lines match north-south grids. If using a non-adjustable declination model, set it to 350 degrees for 10° east declination. This builds reliable compass skills through real-world repetition.
On a final note
You’ve got your compass, map, and skills-even when GPS dies, you’re never lost. Pair a reliable Suunto M-3 with a 1:24,000 topo map, adjust for declination, and trust bearings within 2° accuracy. Triangulate with visible peaks, follow contour lines in fog, and verify every turn. Testers nailed routes in Pisgah using just slope and compass, no signal needed. Practice early, pack light, ride prepared.