Setting Sag Properly on Rear Shock for Cross-Country Weight Distribution
Set your rear shock sag between 20% and 25%-that’s 10.5 to 13mm on a 52.5mm stroke-for cross-country riding with proper weight distribution. Use a digital shock pump to fine-tune air pressure in 5 psi steps, then confirm with an O-ring or Park Tool SAG-1. Sit on the bike in full gear, measure the compressed travel, and adjust until you hit your target. This balance boosts climbing efficiency, small-bump grip, and trail control. You’ll see how air pressure, rider load, and suspension setup work together.
We are supported by our audience. When you purchase through links on our site, we may earn an affiliate commission, at no extra cost for you. Learn more. Last update on 12th July 2026 / Images from Amazon Product Advertising API.
Notable Insights
- Set rear shock sag between 20% and 25% of the 52.5mm stroke for optimal cross-country weight distribution.
- Use an O-ring on the shock shaft to accurately measure sag under real riding conditions.
- Adjust air pressure in 10 psi increments with a digital shock pump to reach target sag.
- Recheck sag after seal break-in, gear changes, or temperature shifts for consistent performance.
- Maintain proper sag to balance climbing efficiency and rear wheel traction on technical terrain.
How Much Rear Shock Sag for Cross-Country Riding?
You’ll want to set your rear shock sag between 20% and 25% of the total stroke for cross-country riding-it’s the sweet spot that keeps your bike efficient on climbs while still soaking up chatter on technical descents. For a 52.5mm stroke length shock, that means 10.5–13mm of travel should compress under your body weight. This sag percentage balances responsiveness and stability without introducing bobbing. Always measure with your riding position dialed in, wearing full gear, so your suspension setup reflects real trail conditions. Use a shock pump to adjust air pressure in 5–10 psi increments until you hit the target consistently. Proper rear shock sag also enhances compression damping response, giving you better control. Getting this right means quicker climbs, confident handling, and a suspension setup tuned precisely to your weight and riding style.
Tools to Measure Rear Shock Sag Accurately
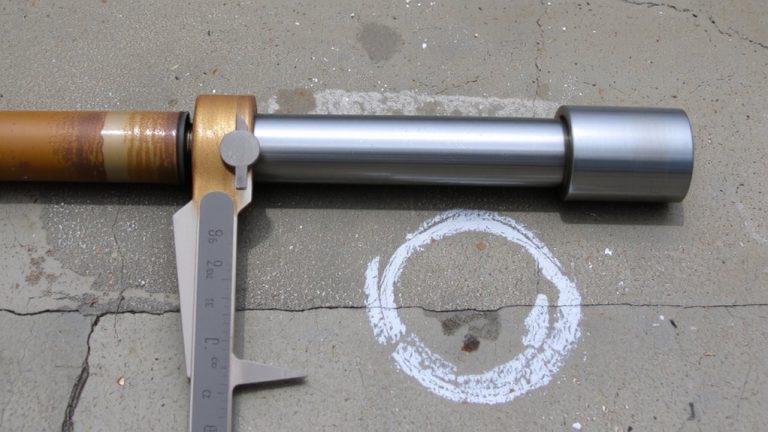
Getting the right sag starts with knowing exactly how much your shock compresses under your weight, and that means using the right tools to measure it accurately. You’ll need a digital shock pump to set your air spring pressure in precise 2–5 psi increments. Use a tape measure or Park Tool SAG-1 to measure the exposed shock shaft in millimeters. Slide an O-ring onto the shock shaft before loading the rear shock. Then, get into your natural seated position on the bike-your full weight must be on the frame. After compression, check how far the O-ring moved from the seal; that distance is your sag. For a 52.5mm-stroke rear shock, 13.1mm equals 25% sag. Some bikes have built-in sag indicators, like on Santa Cruz or Pivot frames, making checks fast and repeatable.
Step-By-Step: Setting Rear Shock Sag With an O-Ring
Start by sliding the O-ring down the shock shaft until it’s snug against the dust seal-make sure the bike’s on a stand or hanging from a hook so it’s completely unloaded, and confirm both compression and rebound damping are wide open to avoid interference. Now, sit on the bike in your normal riding position, feet off the ground, letting your weight compress the suspension naturally-don’t bounce or shift. Carefully step off without pushing down, then measure the distance between the dust seal and o-ring to see how much stroke the rear shock used. Divide that number by the total stroke-like 52.5mm on a Santa Cruz Hightower-and multiply by 100 to get your sag percentage. For cross-country, aim for 20%–25%: this balances travel use and efficiency. Setting sag right guarantees better weight distribution, traction, and control. You’ll need to adjust air pressure later to fine-tune, but this step nails your baseline.
Adjust Air Pressure to Hit Your Target Sag
While your initial sag measurement gives you a starting point, fine-tuning the air pressure in your rear shock is where the setup really comes together, ensuring you hit that sweet spot between 20% and 25% for efficient cross-country performance. Start by using a digital shock pump to adjust air pressure in 10 psi increments-small changes make a big difference. With all damping open, sit on the bike in riding position, then dismount carefully to check o-ring movement on the shock shaft. Measure the compressed stroke and divide it by the total shock stroke (like 52.5mm) to calculate sag percentage. If your sag is off, adjust air pressure accordingly and recheck. Always verify results over a few load cycles so air settles evenly. Properly set sag improves traction, efficiency, and ride quality on technical trails-for cross-country, getting your air right means dialing in both comfort and speed.
Fixing Too Much or Too Little Sag
If your sag creeps past 30%, your cross-country bike’s handling will suffer-rear-end dive, increased pedal strikes, and a slackened head angle can all compromise control, especially on steep climbs or rocky descents.
| Issue | Effect | Fix |
|---|---|---|
| Rear sag >30% | Bottoms easily, poor pedaling efficiency | Reduce air pressure 5–10 psi |
| Rear sag <20% | Harsh ride, low rear-wheel grip | Increase air pressure gradually |
| Poor weight distribution | Slack front, poor tracking | Adjust sag setting to 20–25% |
| Limited suspension travel use | Low small-bump compliance | Fine-tune rebound and compression |
| Incorrect sag setting | Reduced traction, inefficient climbing | Recheck with rider weight on board |
You need proper rear sag to balance climbing performance with control. A correct sag setting between 20–25% guarantees efficient pedaling efficiency, maintains small-bump compliance, and improves rear-wheel grip. Adjust air pressure until you hit the target, so your cross-country bike uses its suspension travel effectively across technical terrain.
When to Recheck Your Sag
A well-tuned rear shock makes a noticeable difference on cross-country trails, but your sag setting won’t stay perfect forever-so don’t assume it’s still spot-on weeks or months after your last adjustment. Recheck sag after the first 5–10 rides; new suspension often loses 5–10 psi as seals break in. You should also recheck sag every 3–6 months or after 50 riding hours, especially before oil service, since worn internals affect air pressure. Changed your riding gear-like switching to bulky winter layers or a full hydration pack? That extra weight means you need to adjust and recheck sag. Added or removed volume spacers in your fork and shock? That alters the pressure curve, so setting sag again is a must. And don’t ignore temperature changes-air pressure climbs 2–3 psi per 10°F rise, impacting sag and overall suspension performance. Stay consistent for reliable results.
Why Proper Rear Shock Sag Balances Grip and Efficiency
You’ve rechecked your sag after break-in, temperature swings, and gear changes-now let’s get into why nailing that 20–25% sweet spot matters so much on cross-country terrain. Proper rear shock sag on cross-country bikes guarantees ideal weight distribution, letting your suspension sag absorb chatter without wasting energy. A good sag setting boosts small bump compliance, keeping your tire glued to the trail for consistent traction. With too little sag, below 20%, you lose suspension sensitivity and fatigue sets in from unabsorbed hits. Too much, over 30%, and you risk bottoming, lose pedaling efficiency, and disrupt bike handling. Correct suspension sag uses the full suspension stroke, offering a balanced platform when setting up your mountain bike. It’s the key to climbing smoothly and descending with control-maximizing both grip and pedaling efficiency.
On a final note
You’ve got this: set your rear shock sag at 25–30% for cross-country riding, use an o-ring and shock pump for precision, and always measure with full gear on. Proper sag boosts traction, pedal efficiency, and control on technical climbs. Testers riding Fox 34 and RockShox SID shocks confirm smoother small-bump response and better weight balance. Recheck weekly, especially after big temperature swings. It’s a quick tweak that transforms how your bike handles real trails.