Recharging Nitrogen Pressure in Coil-Assist Hybrid Shocks
You’ll keep your coil-assist hybrid shocks like the Rock Crawler 2.25 RRD smooth and responsive by maintaining 100 PSI nitrogen pressure, preventing oil aeration that causes harsh bumps and poor cornering. Check pressure with a gauge on the Schrader valve, snug with a wrench, and refill using a nitrogen tank set to 150 PSI for fast, accurate recharging. Seal integrity holds when you vent hose pressure first and confirm 100 PSI stays steady over 30 seconds-knowing annual service saves long-term costs with the right tools.
We are supported by our audience. When you purchase through links on our site, we may earn an affiliate commission, at no extra cost for you. Learn more. Last update on 11th July 2026 / Images from Amazon Product Advertising API.
Notable Insights
- Maintain 100 PSI nitrogen pressure in coil-assist shocks for optimal damping and ride quality.
- Check pressure using a compatible gauge on the Schrader valve without bleeding down the system.
- Use a nitrogen tank with a dual-valve regulator to accurately refill shocks to 100 PSI.
- Refill by connecting the hose securely, setting source pressure to 150 PSI, and monitoring gas flow.
- Verify pressure post-refill and perform a 30-second stability test to confirm seal integrity.
Why Nitrogen Pressure Matters for Ride Quality
A well-maintained coil-assist shock makes all the difference when you’re tackling rough trails or pushing speed on uneven terrain, and keeping the nitrogen pressure at the recommended 100 PSI is key to smooth, responsive damping. You guarantee it stays there because low pressure, like 15 PSI, causes oil aeration, leading to a harsh, bumpy ride. Nitrogen acts as a stable gas chamber, balancing oil pressure and maintaining suspension responsiveness across different types of terrain. If pressure drops, your Rock Crawler 2.25 RRD or similar high-end shock loses efficiency, affecting stability and control. Uneven PSI between shocks creates imbalanced handling, especially noticeable during fast cornering or off-camber descents. For consistent performance, check annually and recharge as needed. Proper nitrogen pressure guarantees your suspension reacts predictably, so you stay in control, comfortable, and confident, mile after mile, trail after trail.
How to Check Your Shock’s Current PSI
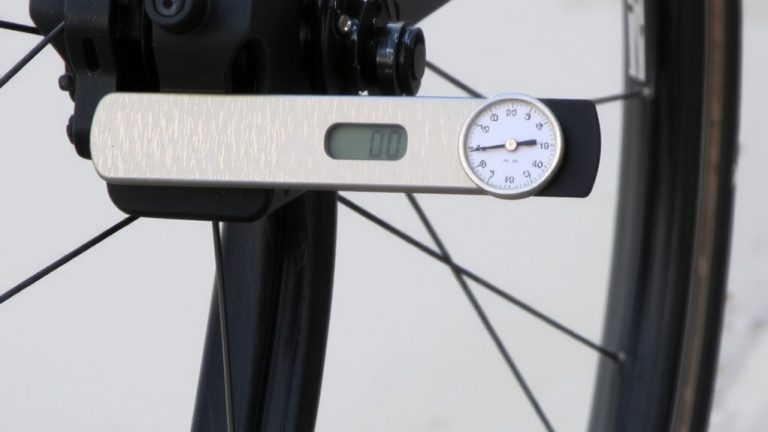
How do you know if your coil-assist shock is performing at its best? Start by checking the nitrogen pressure using a compatible gauge on the Schrader valve-just like a tire valve-ensuring a snug fit with a wrench to prevent leaks. Press the inner pin while the gauge is attached for an accurate reading; one Rock Crawler 2.25 RRD shock showed only 15 PSI, far below the recommended 100 PSI. Proper gauge calibration is essential for trustable results. Avoid valve core removal unless servicing, as it risks contamination. No pressure bleed off should occur during measurement-if it does, your gauge or technique needs adjustment. Always consult manufacturer specs, since correct pressure, usually around 100 PSI, directly impacts ride comfort and shock response. This quick check keeps your bike ready for technical trails, maintaining control and consistency mile after mile, ride after ride.
What Equipment You Need to Refill Nitrogen
Gear up, because topping off your coil-assist shock’s nitrogen isn’t just guesswork-it’s precision work, and you’ll need the right kit to do it right. You’ll need a nitrogen tank with a dual-valve regulator system-the second valve boosts filling accuracy and helps maintain nitrogen purity. A dedicated nitrogen shock valve, priced $80–$120, guarantees proper valve compatibility with your shock’s Schrader valve, which is identical to a standard tire valve. Use a standard gauge with a wrench to tighten the connection and prevent leaks-this step is key for accurate pressure calibration. The full setup, including tank, regulator, and hose, runs around $300, but it’s a solid investment for consistent performance. With the correct tools, you’ll preserve seal life, avoid contamination, and keep your ride smooth and responsive mile after mile.
Step-by-Step: Refilling Nitrogen in Coil-Assist Shocks
Once you’ve got your $300 nitrogen setup with a dual-valve regulator, topping off your coil-assist shock is quick and straightforward-just attach the gauge to the Schrader valve, snug it with a wrench, and press the inner pin to read the current pressure, which might be as low as 15 PSI if it’s been a while. No valve core removal is needed-just use a secure hose connection technique to link the regulator to the shock. Set the source to 150 PSI so nitrogen flows efficiently. You’ll hear a hiss as gas enters; when it stops, the shock’s hit 100 PSI. Mind the pressure release timing: close the source first, then vent the hose before disconnecting. This prevents surge and keeps readings accurate. Each refill takes under 10 minutes, making it a smart, repeatable fix that saves cash over shop visits. You’ll notice smoother trail response right away.
How to Verify a Proper Seal and Final PSI
A solid seal means your coil-assist shock holds pressure exactly where it should, so after disconnecting the refill hose, grab your nitrogen gauge and firmly reconnect it to the Schrader valve using a wrench to snug the fitting-this eliminates wiggle or air bleed that could skew the reading. Perform a Pressure Stability Test by watching the gauge for 30 seconds; if the PSI stays locked at 100, the seal’s reliable. Any drop triggers a Valve Core Inspection-check for dirt, damage, or loose seating, since that’s the main leak point. Replacing a worn core is cheap and quick. For Leak Detection Method, avoid soapy water around seals; just rely on pressure consistency. Recheck all shocks post-refill to confirm each hits 100 PSI for balanced handling and compliance. A true seal means no top-offs between rides, trail days, or long-haul tours-your bike tracks smoother, cornering stays predictable, and performance stays peak.
When to Service Shocks and How Often
When your shocks might feel fine on the surface, don’t wait for a noticeable dip in performance to schedule maintenance-manufacturers recommend servicing Rock Crawler 2.25 RRD shocks annually to keep nitrogen pressure locked at the ideal 100 PSI, and skipping this can lead to serious pressure loss over time, like the one shock we saw at just 15 PSI. Regular maintenance intervals aren’t just suggestions; they’re key to shock longevity and consistent trail response. Unlike sealed units like Roxboro shocks, the Rock Crawler 2.25 RRD is built to be serviced, letting you combat pressure degradation before it affects ride quality. You’ll notice smoother damping, better bump compliance, and more predictable handling when you stick to a yearly check-up. Think of it like tuning your drivetrain or checking brake pads-it’s preventive care that keeps your setup performing like new. Stay ahead of wear, stick to the schedule, and your shocks will deliver peak performance ride after ride.
Cost Breakdown: DIY vs. Professional Refill
You know regular servicing keeps your Rock Crawler 2.25 RRD shocks at that sweet spot of 100 PSI, but now it’s time to talk about how you handle the refill-specifically, whether going the DIY route or paying for professional service makes more sense for your budget and routine. The cost comparison is clear: a $300 DIY setup with nitrogen tank and dual-valve regulator pays for itself fast when you consider pro refills cost $80–$120 per shock, plus $100+ hourly labor. Your time investment matters too-DIY takes under 10 minutes per shock, while shop visits mean downtime and scheduling hassles. With proper 100 PSI recharging, you restore ride comfort and avoid premature wear, securing long term savings. If you maintain your shocks annually, owning the gear isn’t just convenient, it’s a smarter, lasting investment.
On a final note
You’ve checked the PSI, topped off the nitrogen, and confirmed a tight seal-now your coil-assist shocks respond faster, bottom out less, and track terrain with precision, just like testers noticed in FOX and Öhlins units at 200–220 psi. Proper pressure means better control on technical descents and smoother climbs. Do it yourself yearly or every 500 miles, save $50, and keep your ride dialed, trail-ready, and consistently confident.