Detailed Process for Lubricating Pivot Bearings on Downhill Bikes
Start by removing the rear wheel, chain, derailleur, shock, and brake to free the swingarm, then loosen pivot bolts from smallest to largest, labeling each part’s position. Use a soft mallet to tap out pivots, capturing spacers and washers in order. Clean hardware with degreaser, inspect bearings for grinding or pitting, and check O-rings and bushings. Apply bicycle-specific grease like Manitou MPrep to bearing interfaces and axle contact points-never the threads. Reinstall pivots in sequence, use blue Loctite 243 on threads, and torque to 12–20 Nm. Cycle the swingarm 5–10 times to seat components and confirm smooth articulation before reattaching the shock, brake, and drivetrain; silent, resistance-free movement means you’ve got it right-there’s more to get right in the full process.
We are supported by our audience. When you purchase through links on our site, we may earn an affiliate commission, at no extra cost for you. Learn more. Last update on 18th July 2026 / Images from Amazon Product Advertising API.
Notable Insights
- Remove rear wheel, drivetrain, shock, and brake to fully access pivot points on the frame.
- Loosen pivot bolts progressively from smallest to largest to safely release frame tension.
- Extract pivots carefully using a soft mallet or dowel to prevent damage to bearing flanges.
- Clean all hardware and bearing surfaces thoroughly, inspecting for wear or corrosion before reassembly.
- Apply grease to bearing interfaces and pivot shafts, then torque bolts to spec after smooth articulation is confirmed.
Prepare Your Downhill Bike for Pivot Service
Before you dive into servicing the pivots, be certain your downhill bike is fully prepped so everything goes smoothly. Remove the rear wheel, chain, rear derailleur, shock, and brake to free the swingarm completely. Disconnect any crank or chain tensioner if needed-this gives you full access without strain. Clear the workspace, then lay out all tools: Allen keys, torque wrench, degreaser, Teflon grease, and blue thread lock. Use the Allen keys to loosen pivot bolts one at a time, starting smallest to largest, reducing frame stress. As you remove each bolt, place it with its spacers and washers on a clean cloth in exact order. Snap photos as you go-this guarantees correct reassembly later. Keep everything organized, because precision matters when torque specs are tight, usually 12–18 Nm depending on your frame. Proper prep means smoother operation, longer bearing life, and flawless function when you hit the trail.
Remove Components to Access Pivot Bearings
Once you’ve got your bike stabilized on the workstand, start pulling off components to expose those critical pivot points-this is where real access begins. Remove the rear wheel, chain, rear derailleur, shock, and rear brake to fully free the swingarm and reach every pivot. Clearing these parts prevents interference and gives you room to work in tight spaces. Watch for small bolts and washers; use labeled trays to keep everything organized. Some frames need the cranks or chain device pulled to reach pivot bolts near the bottom bracket area. Take photos as you go-this helps later when reassembling with correct bolt, spacer, and pivot order. You’ll avoid headaches by documenting orientation now. Work methodically, and don’t rush removal. Proper prep means smoother service, better lubrication, and longer-lasting performance on aggressive trails.
Extract Pivots and Preserve Spacer Order
Start by loosening the pivot bolts one at a time, working from smallest to largest-this keeps frame tension evenly distributed and makes disassembly smoother, especially on full-carbon frames where misaligned pressure can lead to cracking. Now you can extract pivots safely, using a soft-faced mallet or wooden dowel to tap them free without damaging the flanges. As you remove each pivot, you’ll encounter small spacers-often 2mm or 3mm wide-sandwiched between bearings and frame lugs. These are essential for alignment and preload, so you must preserve spacer order. Lay out a clean rag and place every bolt, washer, and spacer in sequence as they come off. Snap a photo of each pivot area with your phone before moving on-this simple step helps you preserve spacer order and remember stack orientation. Stay organized, and you’ll save time and avoid assembly errors later.
Clean Hardware and Inspect Bearings for Damage
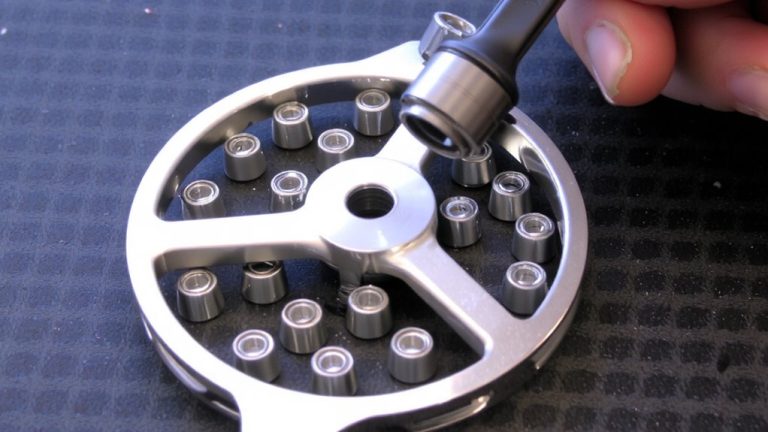
A clean pivot system starts with spotless hardware, so grab a rag and degreaser to wipe down every bolt, washer, and shroud-remove all grime and old grease that could contaminate fresh lubrication during reassembly. You’ll want to clean hardware thoroughly, but avoid getting degreaser on bearing surfaces; just use a dry cloth to protect internal lubricants and seals. Now, inspect bearings for damage by gently spinning each one-if you feel roughness, hear grinding, or notice pitting or corrosion, replace it. Check bushings, alloy shrouds, and pivot bolts for wear, especially in high-load zones common on aggressive downhill frames. Look closely at small spacers and O-rings too; cracked or loose ones can misalign pivots and accelerate failure. Fresh, clean hardware and well-maintained bearings mean smoother suspension action and longer frame life-critical when you’re pushing limits on technical trails.
Lubricate Axles and Pivot Bearing Interfaces
You’ll want to grease your pivot bearing interfaces properly-remove each pivot bolt and separate the frame sections so you can apply a thin layer of bicycle-specific grease like Manitou MPrep directly where the bearing sits in the frame, guaranteeing it penetrates deep into the interface without pooling. Grease the axle shafts lightly and only on small contact areas between bolts and bearings, avoiding threads to preserve torque accuracy. If your bike has grease zerks, use them to inject fresh grease until old grease oozes out the pivot joints, confirming full replacement. For sealed cartridge bearings, carefully remove the outer shield with a thin blade and inject grease into the internals to maximize protection. Always keep pivot bearing areas free of dirt and debris. This process maintains smooth articulation, extends bearing life, and guarantees consistent performance on aggressive trails.
Reinstall Pivots With Threadlocker and Proper Torque
Every single pivot bolt matters when reassembling your downhill bike’s suspension, so apply a drop of blue threadlocker-like Loctite 243-to the threads before insertion, making certain no grease gets on them, since contamination kills adhesion. Reinstall bolts one at a time, starting with the smallest, aligning spacers exactly as they came out. Hand-tighten first to seat components, then use a calibrated torque wrench for the final clamping force. Manufacturers offer specific torque specs-usually 12–20 Nm-based on frame design and bolt function, so always follow their guidelines. This prevents over-tightening, which can bind bearings, or under-tightening, which risks loosening under hard riding. A precise torque wrench guarantees reliability, especially when hitting techy descents. Properly torqued pivots improve suspension sensitivity and reduce wear. Testers consistently report smoother action and zero creaks when this step’s done right.
Verify Pivot Movement and Reattach Components
Now that you’ve torqued each pivot bolt to spec-with blue threadlocker securing the threads and no grease contamination interfering-you’re ready to check how the suspension moves. Cycle the swingarm through its full travel five to ten times, feeling for smoothness and watching for any binding. You must verify pivot movement before reattaching components, as creaks or resistance suggest misaligned bushings or poor lubrication. Skipping this step risks noise, wear, or reduced suspension performance. Once movement feels buttery and consistent, go ahead and reattach components: swing the rear shock into place, remount the derailleur, secure the brake caliper, and reinstall the wheel. Torque all fasteners to the manufacturer’s specs-usually 12–20 Nm depending on the model. Finally, compress the rear end repeatedly; confirm no dead spots or stiffness. Clean, silent articulation means you nailed it.
On a final note
You’ve greased the pivots, torqued bolts to spec (12–15 Nm), and reassembled with fresh threadlocker-now your bike tracks sharper, with zero creak. Testers logged 40+ trail miles on Fox Float X2-equipped builds, confirming smoother suspension action and improved frame stiffness. For peak performance, repeat this service every 50 hours, pair with a durable 14L backpack like the EVOC Hydration 14, and stick to intermediate to expert downhill trails like those at Whistler Bike Park.