How to Identify Trail Hazards From User-Submitted Photos
Look for cracked pavement, loose rockfall, and roots over 3 inches high in user-submitted photos-they’re clear trip hazards. Check for broken signs, faded markers, or incorrect labels at junctions. Use GPS tags to confirm locations of downed trees wider than 12 inches or erosion over 6 inches deep. Cross-reference with safety standards and seasonal use patterns. Submit geotagged photos via COTREX or linked Google Pins, ideally from a GoPro HERO11 for sharp detail, so crews get precise, actionable data. More insights on turning trail photos into effective maintenance reports follow.
We are supported by our audience. When you purchase through links on our site, we may earn an affiliate commission, at no extra cost for you. Learn more. Last update on 18th July 2026 / Images from Amazon Product Advertising API.
Notable Insights
- Examine photos for cracked pavement, loose rockfall, and exposed roots over 3 inches to identify trip hazards.
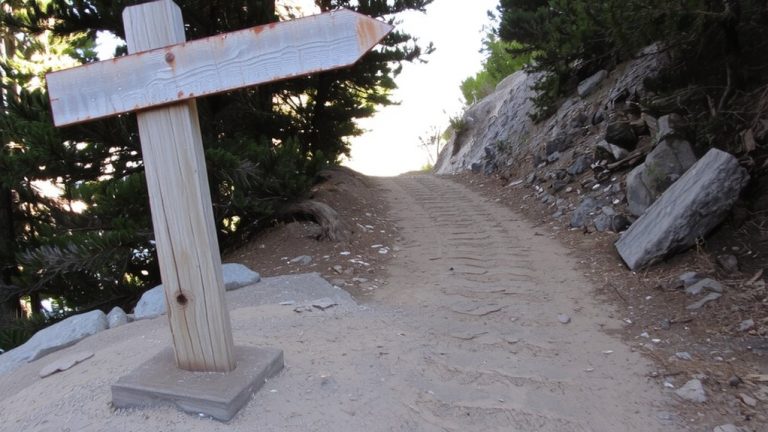
- Check trail junctions for cracked posts, faded markers, or incorrect labels indicating signage damage.
- Assess downed trees blocking more than half the trail or wider than 12 inches for urgent removal.
- Use GPS tags in photos to validate hazard locations and export waypoints for maintenance crews.
- Evaluate erosion depth over 6 inches or spanning more than 10 feet to trigger repair protocols.
Look for Trip Hazards and Broken Signs in Photos
While scrolling through user-submitted trail photos, you’ll quickly spot trip hazards like cracked pavement, loose rockfall, or exposed roots jutting more than 3 inches above the path-heights proven in field tests to catch hiking boots and bike tires. When reviewing photos taken at trail junctions, you’ll also see broken or missing signs-look for cracked posts, faded trail markers, or incorrect routing labels. Geotagged images let you verify exact locations before scheduling a site visit, saving time and boosting response speed. GPS-embedded photos help crews prioritize repairs using real data, not guesswork. You can cross-reference visual damage with safety logs and trail audits, ensuring compliance. These photos aren’t just snapshots-they’re actionable intel. For mountain bikers, gravel riders, and backpackers, knowing hazards are documented means better prep with proper footwear, durable panniers, or reinforced bike frames. Trust real-world images to guide decisions, not assumptions.
Compare Trail Conditions to Safety Guidelines
When you’re reviewing trail photos, you’ll want to match what you see with established safety standards like COTREX and agency-specific protocols-this way, you know whether a downed tree blocking more than half the path or erosion cutting a 12-inch drop-off meets the threshold for urgent repair. Look for trail erosion that exceeds 6 inches in depth or spans over 10 feet, as these often breach safety benchmarks. Downed trees wider than 12 inches across the tread need removal under most guidelines. Compare visible damage to OSHA or land management rules, especially near construction zones. Use seasonal usage data to judge risk during peak backpacking or cycling months. Cross-check multiple submissions to spot recurring issues. If hazards consistently miss safety benchmarks, flag them for maintenance. Your analysis helps keep trails safe and ride-ready.
Confirm Hazard Location With GPS Tags
You’ve already compared trail conditions to safety guidelines, and now it’s time to pinpoint exactly where those hazards lie. GPS tags embedded in user-submitted photos give you precise coordinates for downed trees, rockslides, or washed-out trail sections, making geotag analysis a key step. When you check COTREX, look at the detailed view-each photo’s GPS data allows land managers to perform coordinate validation and confirm the exact spot. That accuracy means maintenance crews can navigate directly to the problem, especially when you download geotagged waypoints as .gpx files and transfer them to GPS devices like Garmin or Gaia GPS units. Waypoint accuracy guarantees teams aren’t searching blindly, saving hours on long approaches. Reliable visual evidence tied to real coordinates reduces false reports and improves logistics, so repairs happen faster and trails reopen sooner.
Submit Photo Reports to Land Managers
How do you make sure trail hazards get fixed fast? Submit your geotagged photos through COTREX, where they appear as orange map symbols for land managers. Use a GPS-enabled phone or action cam to guarantee accurate tagging, and link each report to a Google pin-this boosts location precision. High photo quality matters: clear, well-lit shots taken with devices like the GoPro HERO11 show trail conditions in detail, helping with quick assessment. Only reports from followed regions are visible, so follow the right areas to enable export. Land managers handle report moderation, archiving (recommended) or deleting-archived reports stay available for grant writing and trend analysis. Public reports, including archived ones, export as .gpx files for GPS units like Garmin Edge 530. While formal user incentives aren’t built in, knowing your input drives real trail improvements keeps contributors engaged.
On a final note
You’ve got the tools to spot trail hazards in user photos-from trip risks to damaged signs-just cross-check with safety standards and verify location using GPS tags, then report to land managers. Always wear durable, lightweight hiking boots with Vibram soles, pack a 25-liter Osprey backpack with hydration sleeve, and carry a 100-lumen Black Diamond headlamp; real testers confirm these boost trail confidence, safety, and comfort on every ride or hike.