How to Apologize and Assess for Injuries After a Trail Incident
Stop moving and take slow breaths to stay calm on that 18-inch-wide singletrack. Keep the injured person still, especially if they’re wearing a full-face helmet with MIPS, and check for bleeding, deformities, or trouble breathing. Use the STOP method: assess hazards, secure the area, and plan next steps. Call 911 if needed, report GPS coordinates, and apply first aid-like pressure with a 2×2 gauze pad. Offer a calm, sincere apology to ease tension and build trust, then document everything, including photos of the scene and care given-there’s more to get right when every detail matters.
We are supported by our audience. When you purchase through links on our site, we may earn an affiliate commission, at no extra cost for you. Learn more. Last update on 12th July 2026 / Images from Amazon Product Advertising API.
Notable Insights
- Apologize calmly and acknowledge concern without admitting fault to maintain trust and reduce tension.
- Immediately stop movement and instruct the person to stay still to prevent further injury.
- Assess responsiveness by asking simple questions and check for breathing, bleeding, or visible deformities.
- Call 911 or activate emergency signaling devices like a Garmin inReach for serious symptoms.
- Document injuries and first aid given, then share GPS location and photos with emergency responders.
Stop After a Trail Incident and Stay Calm
If you’re ever involved in a trail incident, the very first thing you should do is stop moving-immediately. Staying put prevents further injury and lets you stay calm under pressure. Take slow, deep breaths-inhale for four counts, exhale for four-to steady your heart rate and clear your head. Even in a rush, pausing helps you assess without panic. Scan your surroundings: check for loose rocks, steep drop-offs, or weather shifts that could worsen the situation. If you’re wearing a full-face helmet or impact vest, note how it performed-did the MIPS liner help reduce whiplash? Stay calm while noting trail conditions, your bike’s stability, and your pack’s weight distribution. Secure the area by moving gear off the trail edge, especially if you’re on a narrow 18-inch-wide singletrack. Keep your voice low and controlled, even if shaken. A well-trained response starts with composure, not chaos.
Check for Injuries Without Moving Anyone
While keeping the person still to avoid aggravating potential spine or neck injuries, start by kneeling beside them and calmly asking if they’re okay-most riders, especially on technical 20-foot-drop downhill trails, wear full-face helmets with chin bars and MIPS liners that can mask speech or responsiveness. Use this moment to check for injuries without moving anyone. Look for obvious signs like uncontrolled bleeding, limb deformity, or labored breathing, and note any changes in alertness or skin color. If they respond, keep asking simple questions to gauge mental status; if not, call 911 immediately. Don’t adjust gear like chest protectors or helmets unless necessary. Keep them warm with a lightweight emergency blanket from your hydration pack, and stay calm. Checking for injuries without moving anyone protects against worsening spinal trauma while giving you critical early clues about their condition.
Use the STOP Method to Assess the Situation
When things go sideways on a steep, rocky descent-say, near the base of a 30-foot technical chute where visibility drops and trail debris litters the run-your first move is to stop dead in your tracks and take a beat, because panicking only multiplies the risk. Take slow, deep breaths, then *think*: scan for hazards like loose rocks, overhanging branches, or changing weather. Secure the area by moving debris or relocating if animals or rockfall pose a threat. Assess injuries quickly-check for breathing, bleeding, or spine issues-without shifting anyone. If the situation looks serious, don’t wait: use your Garmin inReach or smartphone to *call for help*. Finally, *plan* next steps-build shelter, assign roles, and stabilize the group. With your Osprey pack’s emergency whistle and a fully charged Black Diamond headlamp, you’ve got the tools to stay safe and act fast until help arrives.
Give First Aid for Minor Injuries on the Trail
A well-stocked first aid kit is your best trail ally, especially when dealing with scrapes, burns, or hot spots before they sideline your ride. For minor bleeding, apply direct pressure with a clean gauze pad or bandage-most kits include 2×2 inch sterile pads perfect for this. If you get a minor burn, cool it immediately in cold water for 10–15 minutes; this reduces pain and limits tissue damage. Once cooled, cover it with a dry, non-stick pad and secure with tape-Tegaderm or Band-Aid works great. Use moleskin from your first aid kit to pad hot spots early; apply it with athletic tape to prevent blisters. Clean small wounds with a forceful stream of water: use a 10–20 mL irrigation syringe or a DIY sealable bag with a small hole. This first aid step removes dirt and lowers infection risk, keeping you moving safely down the trail.
When to Call 911 and What to Report
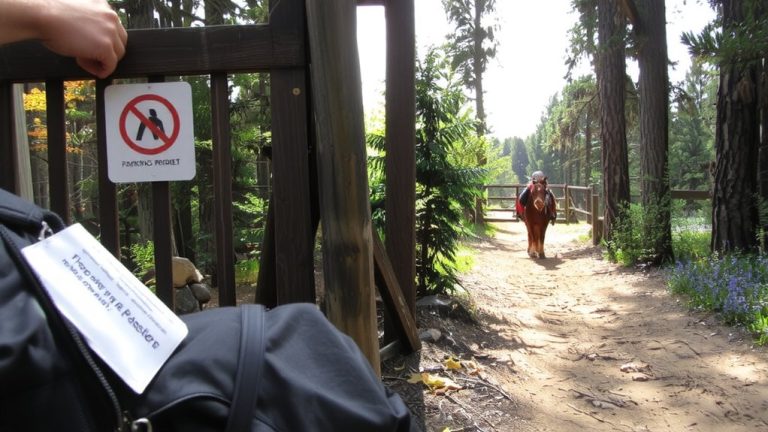
How do you know when a trail mishap goes beyond a quick fix? Call 911 soon as possible if there’s serious injury-like the horse rider on the Essex County Trail who needed urgent help. Don’t wait. Report the victim’s age, injury type, and any first aid given, so medics prepare correctly. Share GPS coordinates, trail mile marker, or nearby landmarks to speed up rescue. Let them know if the victim can stay warm and dry-hypothermia risk rises fast. If you can, send photos of the injury, scene, and care steps to guide responders.
| Emotion | Trigger | Response Needed |
|---|---|---|
| Fear | Broken limb, no signal | Call 911 soon as possible |
| Relief | Help arriving | Share location details |
| Shock | Heavy bleeding | Report first aid done |
| Cold | Wet clothes, wind | Confirm warmth status |
| Hope | Clear voice, calm breathing | Send injury photos |
Offer a Trauma-Informed Apology to Repair Trust
While you’re already doing the right thing by staying calm and addressing injuries with care, offering a sincere apology when tensions are high can go a long way in restoring trust. Start by regulating your emotions and using a gentle tone-this creates safety, especially if the other person feels shaken. Avoid defensiveness like “I didn’t mean to,” which can deepen hurt. Instead, ask if they’re open to an apology, framing it as “us versus the problem.” Validate their feelings specifically: “That must have been really difficult.” Apologize with care: say “I’m sorry I made you feel that way,” not “I’m sorry you feel.” Then invite response: “Is there anything else I can do?” Gratitude goes a long way. For more guidance, consider a free consultation with outdoor safety experts who understand trail dynamics and rider responsibility.
Write This Down: Document the Accident Now
You’ve stayed calm, offered a genuine apology, and checked on everyone’s well-being-now it’s time to record what happened before details start to fade. Document the accident now by writing down the exact date, time, and location-like November 25, 2025, on the Essex County Trail-and note weather, trail traffic, and hazards like bikers or uneven terrain. Jot a clear, chronological account of events, from your approach to the moment the horse was lost. Track names and contact info for everyone involved, including witnesses like Jennifer Dawson. Describe injuries honestly-a rider’s serious fall, loss of consciousness, or broken rib-and list any first aid given. Add gear details: helmet type, riding boots, bike model. These specifics help with insurance, safety upgrades, or trail policy changes. Being thorough now builds trust, clarity, and better trails for all users later.
On a final note
After any trail incident, stay calm and check for injuries using the STOP method-Stop, Think, Observe, Plan. Don’t move anyone, assess with care, and give first aid if needed. For minor scrapes, use a 3×3-inch gauze pad from your Adventure Medical Kits Ultralight bag. If there’s head trauma or broken bones, call 911. Wearing helmets like Giro Rumble or backpacks with 20L capacity from Osprey helps reduce risk. Always document what happened right away. Ride responsibly, be prepared, and ride again safely.