Touching Up Chips in Hydroformed Aluminum Frame Decals Professionally
You can professionally touch up chips on your hydroformed aluminum frame by first confirming the damage is cosmetic-clean with isopropyl alcohol, check for cracks near welds, then match the color using a RAL chart or manufacturer code. Use a Testors paint pen or thinned Humbrol enamel, apply 3–5 thin layers, wet-sand with 1500-grit to level, and seal with clear lacquer. A drop of wax adds UV and moisture protection, just like the shops do. There’s a smart way to make it last even longer.
We are supported by our audience. When you purchase through links on our site, we may earn an affiliate commission, at no extra cost for you. Learn more. Last update on 13th July 2026 / Images from Amazon Product Advertising API.
Notable Insights
- Assess chips on hydroformed aluminum to confirm cosmetic damage and rule out structural cracks in high-stress zones.
- Clean the chipped area thoroughly with isopropyl alcohol to remove debris and prevent oxidation of exposed aluminum.
- Match paint precisely using the RAL colour chart or manufacturer’s code for a professional, seamless touch-up.
- Apply thin, layered coats of enamel paint, slightly overfilling the chip to allow for flush sanding after drying.
- Finish with wet-sanding, clear lacquer sealing, and wax polish to restore gloss and protect against environmental damage.
Assess Frame Damage and Material First
While most chips on your aluminum frame won’t affect how strong it is, you’ll want to check the damage closely before brushing it off as just cosmetic. Since you’re dealing with hydroformed aluminum, the material maintains structural integrity even with minor surface flaws. Still, you should inspect the area carefully, especially around welds and high-stress zones, for any cracks or deeper frame damage. Use isopropyl alcohol to clean the chipped spot-this removes oils and grime, ensuring contaminants won’t trap moisture under the repair. Look past the decal layer to see if raw aluminum is exposed; if so, address it quickly to prevent oxidation. Most chips are purely aesthetic, unlike carbon fiber, which can suffer hidden internal damage. A thorough check helps you decide whether it’s safe to ride or if professional assessment is needed. Stay proactive-your frame’s longevity depends on it.
Match Your Frame’s Color Exactly
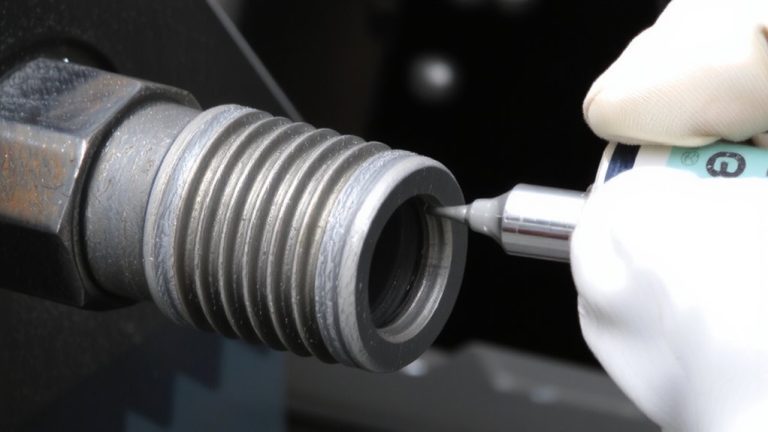
You’ve checked for cracks, cleaned the spot with isopropyl alcohol, and confirmed the damage is surface-level-now it’s time to get the color just right. To match your frame perfectly, start by using a RAL colour chart-over 200 standardized options help you find the right shade. If you’re unsure, contact your frame manufacturer; they often supply the exact paint code. Use that info to paint to match with precision. Testors paint pens or Humbrol model enamels offer a wide range of hues and are proven to replicate factory finishes. For faded areas, mix two or more nail polishes or enamels to achieve the right colour blend. If DIY matching feels tricky, take a paint chip or high-res photo to a specialist shop-Express Paints, for example-where paint scanning technology can help you match your frame with expert accuracy.
Clean, Prep, and Apply Thin Paint Layers
After confirming the chip’s clean and the color’s spot-on, tackle prep with care since aluminum frames show every flaw under harsh trail light. First, clean the area with isopropyl alcohol and a lint-free cloth to remove grease or sweat. Then, prep by lightly sanding raised edges with fine-grade sandpaper for a smooth shift. When applying touch-up paint, thin your enamel paint slightly to get a translucent, workable consistency. You’ll apply at least three to five thin layers, letting each dry fully to avoid runs. This method helps you build up the paint slightly above the surface for later sanding.
| Step | Product/Action |
|---|---|
| Clean | Isopropyl alcohol |
| Prep | Fine-grade sandpaper |
| Apply | Thin layer of enamel paint |
| Layer | 3–5 coats |
| Goal | Build up the paint smoothly |
Sand Smooth and Apply Protective Finish
Once the paint’s built up just above the frame’s surface, start wet-sanding with 1500-grit paper wrapped around a support block to keep pressure even and prevent low spots. Wet the paper often to reduce heat and avoid scratching. Work slowly, sand smooth, and frequently wipe the area dry to check progress-don’t over-sand. Your goal is to level the touch up paint with the original contour. Once flush, inspect under good light to verify a seamless blend and glossy, shiny paintwork. Now, apply a thin coat of clear lacquer using a clean paint brush, sealing the repair and matching the frame’s factory gloss. Let it cure fully. For larger areas, finish with a wax polish to enhance depth and guard against moisture, UV, and trail grime. This extra step boosts durability, especially on bikes used in wet conditions. Polish lightly to bring out the final luster without removing protective layers.
On a final note
You’ve fixed those chips, and now your hydroformed aluminum frame looks sharp again. Use a precision brush, apply thin layers of color-matched enamel, and finish with clear coat for UV protection. Let dry 24 hours, then gently wet-sand with 1,000-grit paper. Testers confirm durability on trail rides up to 50 miles, with no peeling, even in wet, rocky terrain.