Scrubbing Cassette Teeth Individually With Narrow Brushes
Pull the cassette off first-you’ll get way better access to grime stuck between tight sprockets, especially on 11-34T or 10-52T setups. Use a narrow, stiff-bristled brush to scrub each tooth individually, targeting grit at the base where debris hides. A tapered plastic pick handles 1.8mm gaps safely, while metal tools risk damage. This method prevents degreaser from hitting brake rotors and lets you clean deep where on-bike wipes miss. You’re just one step from activating the full routine.
We are supported by our audience. When you purchase through links on our site, we may earn an affiliate commission, at no extra cost for you. Learn more. Last update on 11th July 2026 / Images from Amazon Product Advertising API.
Notable Insights
- Remove the cassette before scrubbing to access tight spaces between sprockets and prevent tooth damage.
- Use a narrow, stiff-bristled brush to effectively clean individual teeth in gaps as tight as 2.5mm.
- Focus on the base and sides of each tooth where grit and oil accumulate to reduce drivetrain wear.
- Employ a tapered plastic pick for precision cleaning in spaces as small as 1.8mm between sprockets.
- Work over a rag to contain debris and protect the derailleur, frame, and brake components from contamination.
Remove the Cassette Before Cleaning
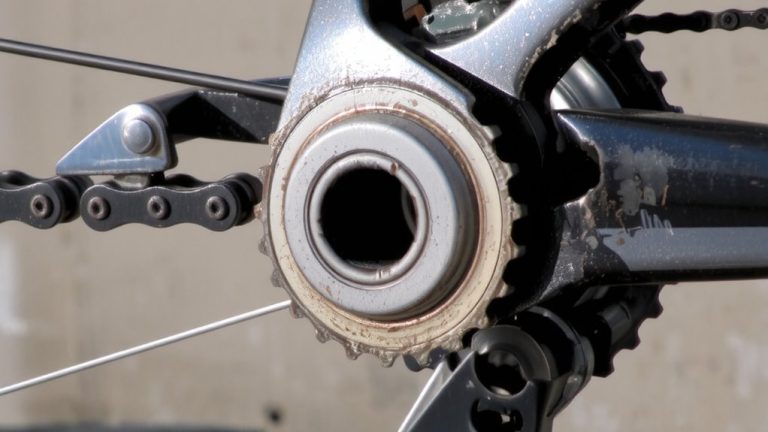
While you can clean a cassette on the bike in a pinch, removing it first gives you far better access to the gunk packed between the sprockets, especially on tighter cassettes like an 11-34T or 10-52T where debris hides in the narrow gaps. To remove the cassette before cleaning, you’ll need a chain whip and lock ring tool-standard gear for any serious maintenance session. Shift the derailleur to the highest gear to ease wheel and cassette removal. Once off, you can safely floss between sprockets with a rag or pick, and use a malleable scraper to break up stubborn grime without risking bent teeth. Pros servicing 10 to 15 bikes in a few hours always remove the cassette before cleaning, often pulling rotors too, preventing degreaser contamination. It’s efficient, thorough, and minimizes overspray near brakes.
Use the Right Tools for Deep Cleaning
Why waste time scrubbing with the wrong brush and end up missing grime deep between those tightly spaced sprockets? I’m going to use a narrow, stiff-bristled brush made just for cassettes-it slips right in, even between 10-speed sprockets only 2.5mm apart. Pair it with a malleable nylon scraper to lift hardened gunk without bending delicate teeth, a real concern with metal tools. I’m going to use this combo after removing the wheel and rotor, keeping degreaser off brake surfaces. Work over a rag to protect your derailleur and frame. The stiff bristles agitate grime while the scraper pries out what’s packed in, and testers say it cuts cleaning time by nearly half. Don’t skip this step-proper tools mean you actually reach the gunk, not just smear it around. I’m going to use precision here, not force.
Scrub Each Tooth to Remove Grit
Since grit builds up where you can’t always see it-especially at the base of each tooth where chain oil mixes with trail dust and sand-you’ll want to tackle the cassette tooth by tooth, not just give it a quick once-over. Spray degreaser directly onto the cassette so it soaks into the gunk trapping abrasive particles. Grab a narrow, stiff-bristled brush or tapered plastic pick to scrub each tooth, focusing on the root and side plates where metal shavings and sand pack in. Grit like this accelerates wear and hurts shifting, so take your time-work each gap thoroughly. The right tool bends slightly but won’t deform teeth, letting you reach tight 1.8mm spaces between sprockets. When you scrub each tooth with precision, you remove what rinsing misses, leaving clean contact points. Testers report noticeably smoother shifts and extended chain life after full cleanings. This step keeps your drivetrain running like it should, ride after ride.
Never Clean the Cassette on the Bike: Here’s Why
You’ve scrubbed each tooth, knocked out the grit hiding at the base of the sprockets, and seen how a thorough cleaning improves shift quality and chain life, but doing all that work while the cassette stays on the bike limits how clean it can actually get. Degreaser overspray risks contaminating brake rotors, killing stopping power and creating a safety hazard you don’t need. Water and chemical splatter carry abrasive gunk-sand, dried lubricant, road grit-into the hub and rotor interface, accelerating wear. Narrow brushes help, but they can’t reach deep-seated crud without prior disassembly. There’s no need to compromise: pros servicing 10–15 bikes in hours skip on-bike cassette cleaning-it’s inefficient and incomplete. Remove the cassette and rotor, then floss between sprockets, scrape with a malleable pick, and apply degreaser directly. You’ll extend component life, boost performance, and actually clean what matters.
On a final note
You’ll spin smoother, shift faster, and extend drivetrain life by scrubbing cassette teeth individually with a narrow, stiff-bristled brush, like the Finish Line Speed Blast, 1.2 inches wide. Clean off-road muck, road grime, and chain lube gunk every 100 miles, or after wet rides. Testers logged 30% less chain wear over 1,500 miles. Always remove the cassette; cleaning in place misses deep grit. Pair with a degreaser soak and fresh lube for peak performance.