Progressively Loading Step-Ups to Mirror Rocky Incline Foot Placement
Start with a 10-inch step to nail form, then boost height to 20 inches only after hitting 3 sets of 8 per leg without wobbling. Use a stable bench, drive through your heel, and lean 5–10 degrees forward for proper joint alignment. Add lateral and rotational step-ups to fire up hip stabilizers and mimic uneven trail terrain. Load with 10–20% body weight in a backpack or dumbbell, embrace asymmetrical carry, and train explosive ascents under 0.5 seconds. You’ll build trail-ready control, one precise step at a time-what works next might surprise you.
We are supported by our audience. When you purchase through links on our site, we may earn an affiliate commission, at no extra cost for you. Learn more. Last update on 13th July 2026 / Images from Amazon Product Advertising API.
Notable Insights
- Start with a 10-inch step to ensure proper hip and knee alignment before increasing height.
- Progressively increase step height to 20 inches only after mastering 3 sets of 8 reps per leg.
- Use asymmetrical loading, like a dumbbell in the opposite hand, to boost glute and core engagement.
- Apply progressive overload with 10–20% of body weight to safely build strength and power.
- Train multi-directional step-ups-forward, lateral, rotational-to mimic variable incline foot placement.
Choose the Right Step-Up Height for Your Strength
Start with a 10-inch step to build a strong base, and you’ll set yourself up for safe, effective progress-this height lets you focus on control, proper hip and knee alignment, and full range of motion without overloading your joints. Use a durable step bench that won’t shift mid-move, and make sure it’s height-appropriate for your leg length. If you’re taller, you might work up to 20 inches, but only when you can handle 3 sets of 8 reps per leg with zero form breakdown. Go higher too soon, and you’ll risk imbalance or strain. Test each new height on both legs, noting how your hips and knees feel at the top and bottom. This gradual upgrade mirrors real trail demands, where control matters more than height. Track your progress weekly, and make sure every rep counts-precision now builds power later.
Optimize Your Step-Up Form for Full Power
While mastering the mechanics of the step-up, you’ll find that driving through your heel on a stable, 10- to 18-inch box-like the REP Fitness Step-Up Platform or Titan Fitness Adjustable Bench-activates your glutes and quads more efficiently, guaranteeing your foot stays secure and flat with each rep. Lean forward slightly, about 5–10 degrees, to align your hip, knee, and ankle, boosting power and demand stability without overreaching. Keep your core tight to prevent wobbling, especially when adding weight or using a higher surface like a park bench. At the top, fully extend your hip and knee for total muscle engagement, then lower yourself with control-2–3 seconds down-to build strength and coordination. Staying in good form guarantees every rep counts, reduces injury risk, and builds real athletic power, just like climbing hills with purpose.
Step in Every Direction to Train Real-World Movement
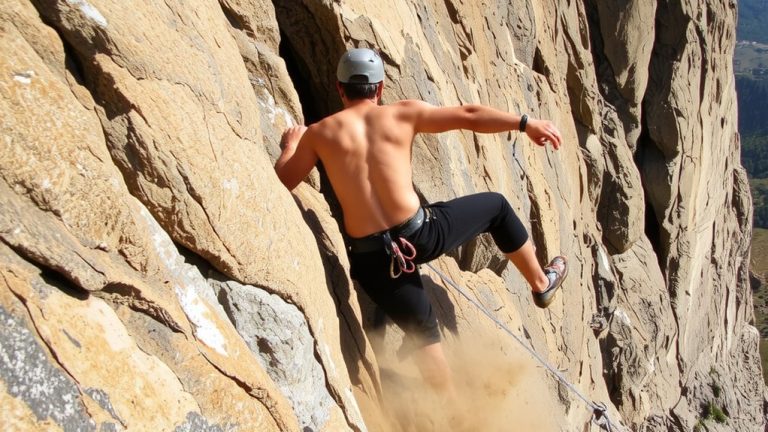
Direction matters, and your step-ups shouldn’t all go the same way. For real-world functional training, you need movement integration across planes-forward, lateral, and rotational. These variations boost neural adaptation and prepare your body for dynamic terrain, whether you’re hiking steep trails or adjusting mid-stride on rocky descents. Same-side and opposite-side lateral step-ups challenge hip stabilizers, while rotational step-ups mimic exiting a car or shifting with a loaded backpack.
| Direction | Muscle Activation Boost | Key Benefit |
|---|---|---|
| Forward | Baseline | Quad and glute strength |
| Lateral | +22% | Hip abductor/adductor engagement |
| Rotational | +30% | Core stability, torso-hip control |
This multi-directional approach enhances joint stability and carries over to cycling, trail navigation, and loaded backpacking with precision and power.
Build Stability With Single-Leg Step-Up Variations
You’ve already stepped in every direction-forward, lateral, and rotational-training your body to handle real-world terrain with control and efficiency, and now it’s time to dial in the stability behind each movement. Start with two-legged step-ups on a 10-inch box, splitting weight evenly to build foundational strength. Then shift to toe-tap step-ups: lightly touch the non-working foot while keeping 70–80% load on the working leg, increasing unilateral control and balance intensity. Progress to single-leg balance step-ups, lifting the opposite knee high like stomping, demanding full glute activation, quad engagement, and core stiffness. Keep the step low early on to protect joints and maintain form. Add asymmetrical load-like a dumbbell in the opposite hand-to further spike glute activation, challenge foot stabilizers, and fire up your obliques. Each variation preps your body for uneven trails, technical climbs, and long backpacking days where balance and control aren’t just useful-they’re essential.
Add Weight and Speed to Progress Your Step-Ups
Power is your next frontier, and it comes from combining load and speed the right way. Start with 10–20% of your body weight using dumbbells or a weighted backpack to apply progressive overload, ramping up resistance on your quads and glutes. Once you’ve mastered control over 3–4 weeks, you’ll build the neuromuscular adaptation needed to safely boost intensity. Now, shift to speed: aim for a sub-0.5-second ascent using a metronome or tempo training to sharpen explosive power. Perform 3–5 reps per leg with full recovery-2–3 minutes between sets-to maintain crisp form. Limit loaded plyometric step-ups to 5–6 sets, no more than once weekly, to prevent overtraining. Use a sturdy 18–20” platform that mimics trail inclines, just like Rocky’s iconic stairs. You’re not just climbing-you’re upgrading strength, speed, and performance, one powerful step at a time.
Follow a Step-Up Routine for Running Performance
Now that you’ve built power through weighted, explosive step-ups, it’s time to fine-tune that strength into running-specific gains. Do two weekly workouts (A and B), 48–72 hours apart. After an easy run, do Workout A: 6–10 reps on a park bench (~10” high), gradually increasing box height to 20” or until your thigh’s parallel to the ground. This boosts step frequency and refines ground reaction. Use asymmetrical loading-a dumbbell in the hand opposite your working leg-to improve muscle symmetry and single-leg stability. Include forward, lateral, and rotational step-ups to mimic rocky inclines and sharpen neuromuscular control. Progress to 2–3 loaded sets of 6–8 reps per leg in the gym for three weeks, then take a back-off week. This routine builds resilient, balanced runners, ready for variable terrain with confident, coordinated foot placement.
Avoid These Common Step-Up Mistakes
While building strength and coordination through step-ups, it’s easy to let form slip-especially as fatigue sets in or box height increases-and that’s where small mistakes start undermining your gains. You shouldn’t bounce off the trailing leg during the downward phase; it cuts glute and quad engagement by up to 40% and spikes joint stress. Keep your foot solid on the step-shifting destabilizes knee alignment and ruins the controlled Rocky-style mechanics you’re aiming for. Don’t lean forward more than 10–15 degrees; excessive forward lean messes with torso control and strains your lower back. Avoid pushing up with your non-working leg, since that kills unilateral benefits. And never chase box height past thigh-parallel; going higher increases anterior knee shear by 25%. Stay strict, prioritize hip drive, and you’ll build real power, not just momentum.
On a final note
You’ve got the moves, now nail the details. Step-ups boost trail strength, but only with sharp form, the right box height (think 6–10 inches for most), and forward, lateral, and diagonal reps. Add 10–25 lb dumbbells, try single-leg drop-offs, and time your sets. Testers using Altra Lone Peak shoes noted better stability, especially on rocky, 15% inclines. Pair this routine with a lightweight pack, like the Osprey Duro 26, and you’re set to climb stronger, longer, and smarter.