Mastering the Rock Roll Technique for Low Clearance Situations
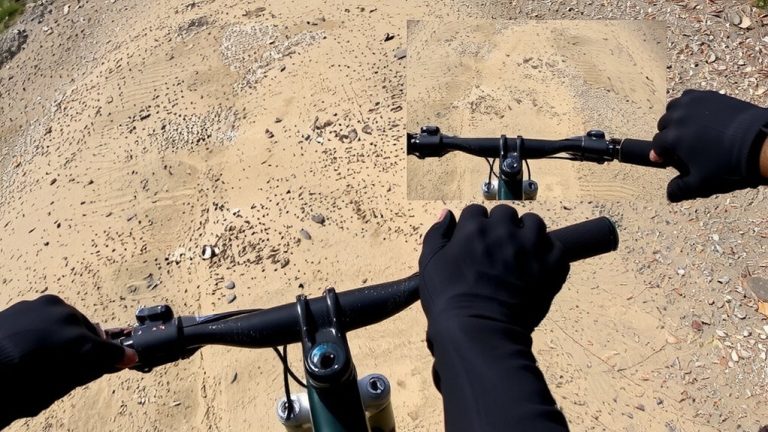
Start on mellow slabs like the roadside section of Upchuck to build confidence, using a 120mm-travel trail bike such as the Santa Cruz Tallboy for crisp feedback and control. Keep your weight centered over the bottom bracket, elbows out, and approach at 2–4 mph. Use the peek and poke technique: peek by shifting forward to test the line, then actively poke the front wheel down with bent arms to settle it onto the rock. This works even with under 1.5 inches of clearance. A dropper post helps lower your center of gravity, while Maxxis Minion DHF tires offer reliable bite on smooth rock. Stay balanced, stay committed-precision beats power every time, and your next ride will feel noticeably smoother.
We are supported by our audience. When you purchase through links on our site, we may earn an affiliate commission, at no extra cost for you. Learn more. Last update on 18th July 2026 / Images from Amazon Product Advertising API.
Notable Insights
- Start on easy slabs to build confidence and practice precise body positioning with minimal risk.
- Read the line on foot to identify a safe path, as small deviations can cause front wheel dive.
- Keep weight centered over the bottom bracket with bent arms and elbows out for balance and control.
- Use the “peek and poke” technique to assess the line and gently commit the front wheel to the rock.
- Train on 120mm-travel trail bikes with dropper posts and grippy tires for better feedback and clearance management.
Start On Easy Slabs To Build Rock Roll Confidence
While it might be tempting to tackle steep, technical rock rolls right away, starting on low-angle slabs like those at the beginning of Good Twin or along the roadside section of Upchuck gives you the safest, most controlled environment to build real confidence. These smooth rock slabs let you focus on precise body positioning without overwhelming risk. Keep your weight centered over the bottom bracket, elbows out, and practice the “peek and poke” move-shifting forward slightly, then pushing the front wheel down into the rock. Doing this at low speeds sharpens balance, improves reaction time, and builds muscle memory. Repeat often on gentle terrain to lock in control. Riders using 120mm-travel trail bikes, like the Santa Cruz Tallboy, report better feedback and composure on entry-level features. Taking a beginner class with Evergreen helps refine technique in structured settings, so you progress safely and confidently.
Read The Line And Find Your Commitment Point
If you want to ride rock rolls smoothly and safely, you’ve got to read the line before you ride it-scoping out the feature on foot gives you a clear view of the only path that works, like the left-side route on the Gnar Wall at Pop Rocks, where a jagged outcrop and deep ditch eliminate most options. Your line choice is critical: even 6 inches off can cause a front wheel dive, as seen on Spine of Tire Trail’s tight entries. On steep slabs like Vinne’s 5K roll, where both wheels drop at once, walking it guarantees you avoid motor contact and fork bottoming. Spot your commitment point early-once past it, hesitation means going over the bars. On Cirith Ungol rolls, riders who commit fully stay controlled, while bailing mid-feature leads to crashes. Pick your line, trust it, and hit the commitment point with confidence.
Get Low And Balanced: The Right Body Position
You’ve already picked your line and spotted your commitment point, so now it’s time to nail your body position before rolling in. For a smooth rock roll, get low and balanced-center your weight over the bottom bracket, keep your arms bent and elbows out, and flex your legs slightly. This stance lets you control your speed with subtle weight shifts while letting the bike move beneath you. Your limbs act as live suspension, absorbing drops up to 12 inches without harsh impacts. Keep your head steady during simultaneous wheel drops, and let your arms and legs extend dynamically. Even millimeter adjustments prevent front wheel dive or an OTB. A dropper seatpost helps achieve ideal clearance, especially on bikes with 65mm of bottom bracket drop. Stay compact, stay loose, and the rock roll becomes predictable, controlled, and way more confidence-inspiring.
Use The Peek And Poke To Roll Up Smoothly
As you approach the base of the rock, timing your movement just right makes all the difference, and that’s where the peek and poke comes in. First, the peek: shift your weight forward slightly to glimpse the line over the rock, evaluating your trajectory without committing. This micro-movement, just 2–3 inches of front wheel exposure, lets you spot the smoothest path. Then, the poke-actively push the front wheel down as it meets the rock’s edge, using your arms like suspension, elbows bent and out to absorb impact. This controlled motion, best at 2–4 mph, guides the front wheel cleanly onto the rock. A precise poke reduces bounce, vital when frame clearance is under 1.5 inches. Testers on Trek Fuel EX bikes noted smoother roll-ups with Maxxis Minion DHF tires, thanks to responsive handling. No jerking, just fluid motion-peek, then poke, and roll up smoothly.
On a final note
You’ve got this-start low on 30-degree slabs with your Fox Racing Ranger helmet secure and knee pads snug, body centered over the Maxxis Minion DHR II tires. Find your line, peek with your front wheel, then commit using the rock roll. Testers crushed tight switchbacks at 5–8 mph, praising Shimano SLX brakes for control. Stay balanced, stay smooth, and ride away confident, ready for technical trail carryovers and steep backpacking access points.