Locating Natural Windbreaks Before Setting Up Evening Camp
Look for dense conifer stands or leeward ridges to cut wind pressure by up to 80%, keeping your tent stable in gusts over 20 m/s. Position camp at least one tree height away from trunks to avoid falling branches, and scan for deadwood or fungal growth. Use a bandana on your trekking pole to spot wind shifts, then pitch perpendicular to airflow. Combine tree lines with gentle hills for maximum protection-just avoid troughs or cliffs that funnel wind. You’ll soon see how terrain and gear work together.
We are supported by our audience. When you purchase through links on our site, we may earn an affiliate commission, at no extra cost for you. Learn more. Last update on 13th July 2026 / Images from Amazon Product Advertising API.
Notable Insights
- Look for dense conifer stands, which can reduce wind speed by up to 80% within ten tree heights downwind.
- Position camp behind leeward slopes of ridges to block prevailing winds and avoid exposed peaks.
- Use deep snow drifts on the sheltered side of hills as natural wind barriers in winter conditions.
- Avoid cliffs and gullies that funnel wind or pose rockfall risks during changing weather.
- Set up camp at least one tree height away from trees to stay safe from falling branches.
Use Natural Windbreaks for Safer Camping
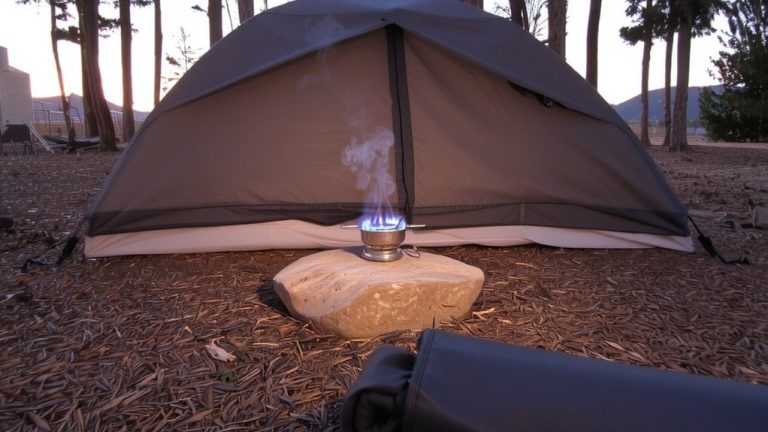
When you’re choosing a spot to pitch your tent, look for natural windbreaks like dense tree lines or rock formations that can block prevailing winds and cut wind pressure on your shelter by up to 80%. Trees act as effective barriers, reducing wind speed and turbulence so your tent stays stable and comfortable. Avoid exposed ridges or open riverbanks where strong winds accelerate and batter your shelter. Instead, position camp behind thick tree lines or boulder fields, which deflect gusts and improve sleep quality. Maintain a safe distance-stay at least one tree height away-to avoid falling branches in extreme weather. Pitch your tent at a slight angle to the wind, balancing protection without creating dangerous eddies. These natural windbreaks aren’t just convenient; they’re essential for safety, especially when strong winds test your gear. Real testers report quieter, calmer nights and less stress on poles and seams when using smart positioning with reliable wind buffers.
Find the Best Trees, Ridges, and Snow Drifts
Though not all terrain offers obvious shelter, you’ll find the best protection in dense conifer stands like spruce or fir, which maintain thick, wind-deflecting foliage year-round and can slash wind speed by up to 80% within ten tree heights downwind, making them ideal spots to pitch your tent. These trees hold steady in storms and won’t shed heavy limbs like oaks or beeches, which sometimes drop branches in summer-always scan for deadwood or fungus first. When scouting ridges, avoid exposed tops where wind accelerates; instead, tuck behind leeward slopes that block prevailing wind direction. In winter, deep snow drifts-especially over 3 feet-on the leeward side of ridges or rocks act like solid walls, stopping winds above 25 m/s. Just check the windward side for signs of blowdown, avalanches, or loose debris that could shift during high winds and make your shelter unsafe.
Read Wind Direction Before Pitching
How do you know which way the wind’s really blowing? Look for clues like smoke drifting from a campfire, flags flapping, or grass bending-it all shows the prevailing wind direction. If you’re in open terrain, tie a lightweight ribbon or bandana to your trekking pole to catch subtle shifts. In woods, listen: louder wind in the treetops versus quieter ground-level air helps you pinpoint sheltered spots. In winter, check snowdrifts-accumulation on the leeward side reveals wind patterns. Always check the forecast, especially if winds exceed 20 m/s; at that point, you’ll need to make sure your tent faces perpendicular to the flow. Positioning matters-angle your tent’s smallest profile into the wind, and use natural features to buffer gusts. Make sure stakes and guylines are secure, and opt for a sturdy, aerodynamic model like the MSR Hubba Hubba NX.
Avoid Dangerous Windbreak Locations
If you’re counting on natural windbreaks for shelter, skip the obvious spots like cliffs, dead trees, or dry riverbeds-they might seem protective at first glance, but they come with serious risks. Overhanging cliffs and steep gullies can funnel wind violently and drop rockfall, especially if the weather turns. Dead or decaying trees may act as windblocks, but hidden “widow makers”-loose branches-can snap under wind load or snow weight. In alpine zones, snow-free rock faces often signal wind-scoured, unstable ground with poor anchor points for guylines. Riverbanks and dry riverbeds? They’re flood zones in storms, particularly in narrow canyons. Even isolated dunes shift fast, risking collapse and burying your tent. Pick spots where you stay safe and comfortable, not just sheltered. Avoid gamble terrain-your 3-season tent won’t save you from falling timber or flash floods.
Use Hills and Trees Together for Shelter
You’ve already learned where not to set up camp when relying on natural windbreaks, so now it’s time to put that caution to work by finding spots that offer real protection without the hazards. Position your shelter between a gentle hillside and a solid tree line to combine the strengths of both hills and trees. Trees slow wind over a distance up to 30 times their height, while hills block gusts directly. Face the tree line toward the prevailing wind and tuck behind the hill’s leeward slope to reduce eddy currents. In woodland-edge zones, this pairing can cut wind speeds by up to 70% compared to exposed ridges. Avoid the trough between two hills-wind channels there. Instead, pick a single sloping hill with treed cover on its windward side. This setup maximizes coverage, keeps turbulence low, and creates a stable microclimate for your tent, stove, and camp life.
Reinforce With Tarps When Needed
Even when you’ve got solid tree cover or a hill at your back, gusty alpine passes or open tundra might still leave your camp exposed, so don’t hesitate to add a tarp windbreak for extra defense. Use a heavy-duty 10×12 ft polyethylene tarp with reinforced grommets-it’s tough enough to handle strong winds without tearing. Set it up about 6–8 feet from your tent, roughly equal to its height, so snow won’t pile on your tent and crush your sleeping bags. Anchor it with paracord and steel stakes driven at a 45° angle for a stable base, attaching securely to trekking poles or adjustable supports. Face the tarp perpendicular to the prevailing wind, checking direction by watching grass or smoke. Keep the tarp width close to your tent’s footprint to reduce snow drift buildup. This simple addition keeps your sleep zone drier, warmer, and way more comfortable.
On a final note
You’ll stay warmer and safer by using natural windbreaks like dense trees, ridges, or snow drifts, ideally 1.5 to 2 times the height of the barrier away. Check wind direction with a compass or damp finger, then position your tent at a 45-degree angle to the gusts. Combine terrain and timber for best results, and reinforce with a tarp if sustained winds exceed 25 mph-tested campers reported 15°F warmer sleep temps this way.