Best Psi for Mountain Bike Tires
Your best mountain bike tire pressure starts around 25 psi front and 28 psi rear if you’re riding tubeless, a common setup for modern 2.4-inch tires, with adjustments based on your weight-split that by 7 for a baseline rear pressure. Drop 2–3 psi for chunky terrain to boost grip and comfort, or go higher on smooth trails to roll faster. Run 4–5 psi higher if you’re using tubes to avoid pinch flats, and always fine-tune based on how the bike feels carving corners or hitting roots. You’ll find your sweet spot by testing small changes across different trails.
We are supported by our audience. When you purchase through links on our site, we may earn an affiliate commission, at no extra cost for you. Learn more. Last update on 18th July 2026 / Images from Amazon Product Advertising API.
Notable Insights
- Start with a baseline of rear tire pressure by dividing your total rider weight in pounds by 7.
- Reduce pressure by 2–3 psi for rough, wet, or loose terrain to improve grip and compliance.
- Increase pressure by 2–4 psi on smooth, dry trails to lower rolling resistance and prevent bouncing.
- Set rear tire pressure 2–4 psi higher than the front to match weight distribution and improve traction.
- Use 23–28 psi for tubeless setups and add 5 psi for tubed tires to avoid pinch flats and burping.
Understand Why Tire Pressure Is Crucial
Tire pressure, that silent force shaping every bump and turn, is your first line of defense on the trail. Your Mountain Bike Tire Pressure affects grip and comfort, rolling resistance, and risk of pinch flats. Too high, and you lose shock absorption-tires skip on loose descents, reducing control. Too low, and you risk burping air, rim damage, or tire squirm. Ideal tire pressures balance these extremes, maximizing the contact patch for better traction and compliance. This improves micro-suspension, helping you float over roots and rocks. Pressure also influences how efficiently your bike rolls-research shows a breakpoint where impact energy and casing deformation are minimized. Rider weight plays a role, but that’s the next step. Get this part right, and you’ll ride faster, smoother, and with far more confidence-all without changing gear.
Start With Rider Weight to Set Base Pressure
While there’s no one-size-fits-all number, your weight-yes, including your gear-should be the starting point for dialing in tire pressure, because the load you carry directly shapes how your tires compress over roots, rocks, and drops. As a rider, your rider weight determines how much Pressure your mountain bike tires need to roll efficiently and grip the trail. A solid rule is dividing your total weight by 7 to get a baseline rear tire pressure in psi. For example, at 200 lbs (rider plus gear), start around 29 psi in the rear tire and 27 psi up front. Heavier riders often need over 30 psi rear, lighter ones 23–25 psi. This balance supports proper weight distribution across the bike and boosts control. Use this as your foundation before fine-tuning for terrain.
Choose Pressure Based on Trail Conditions
Now that you’ve used your loaded rider weight to set a baseline-like 29 psi in the rear for a 200-pound rider with gear-it’s time to adjust based on what the trail throws at you. On rough terrain like rocky mountain bike trail sections, drop 2–3 psi for better compliance and grip over roots and drops. For smoother trails and fast, smooth surfaces like hardpack, bump pressure 2–4 psi to cut rolling resistance and boost efficiency. In wet or loose conditions, reducing pressure by 2–3 psi increases your tire’s footprint, improving traction when cornering or braking. On dry grippy trail conditions, you can run up to 35 psi-sometimes 50 psi on smoother trails-to maximize speed without sacrificing control. Tailoring pressure to trail riding conditions keeps you stable, efficient, and confident, no matter the terrain.
Set Front and Rear Tires for Balance
Since your rear tire carries more of your weight, especially when seated or pedaling hard, it usually needs 2–4 psi more than the front to maintain balance and traction-think 27–28 psi in the rear with 23–24 psi up front for a tubeless setup on a full-suspension bike. This slight difference is a solid rule of thumb: your rear pressures should be slightly higher pressure than the front tire for better grip and impact support. Lighter riders might run at lower pressures, like 25 psi front and 27 rear, while heavier or aggressive riders may push 30–32 psi. Adjust according to your weight, terrain, and confidence. Keeping the front tire at lower pressure boosts steering compliance, helping it absorb bumps and hold corners, especially on rocky or loose trails.
Adjust for Tubeless vs Tubed Setups
If you’re running tubeless, you can drop the pressure confidently, starting around 23–24 psi up front and 27–28 psi in the rear for a balanced ride that grips hard and rolls smooth over roots and rocks. A tubeless setup reduces pinch flats and lets you fine-tune air pressure without worrying about tube damage. Just don’t go below 20 psi-especially on sharp hits-as it can cause tire ‘burping’ and sealant loss. When you pump your tires, remember that running tubeless requires a secure rim and tire seal to maintain stability. With tubes, add about 5 psi-closer to 33 front and 35 rear-to prevent pinch flats, or up to 40 psi if you’re heavier or aggressive. Unlike a one size fits approach, matching pressure to your setup makes all the difference.
Dial In Pressure Using Ride Feedback
How does your bike feel when you hit a rocky descent or carve through a muddy corner? Start with 25–30 psi in the rear and 20–25 psi up front as a baseline for your mountain tires. If the ride feels harsh or bouncy, drop 2–3 psi to boost traction and compliance-the lower pressure makes a noticeable difference on rough lines. But if you’re burping air or hitting rims, bump it up by 2–3 psi for protection. Tire squirm in hard corners? A slight increase sharpens handling. Every rider’s feedback loop is unique, shaped by weight, ride style, and terrain. Pay attention to grip, comfort, and efficiency after each ride. Fine-tuning brings you closer to ideal tire pressure, where control, speed, and confidence on your mountain bike just click.
Check Tire Pressure Before Every Ride
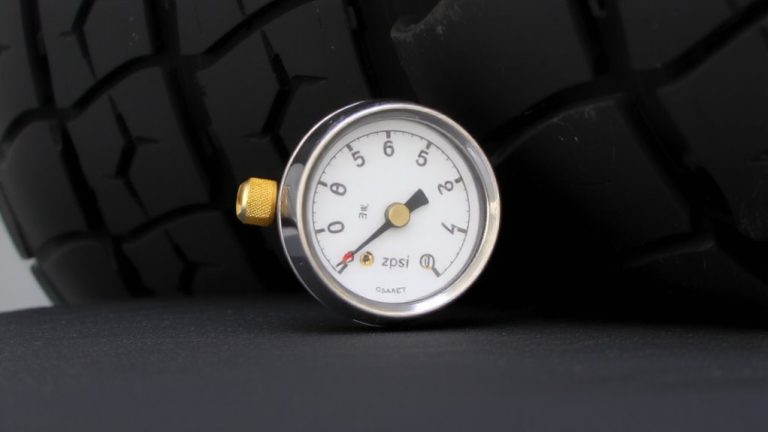
You’ll almost always ride better when you check tire pressure before every spin, especially since even the best tubeless setups can lose 5–10 psi over a few days thanks to sealant evaporation and tiny bead leaks. That pressure loss can spike rolling resistance, reduce grip, and make burping more likely on chunky terrain. Temperature changes play a role too-a 10°F drop can reduce pressure by 1–2 psi, so morning rides may need a bump. Always use a digital gauge; floor pump readings are often off by 10 psi. After crashes or weather shifts, recheck pressure to stay safe and efficient.
| Factor | Pressure Effect | Rider Action |
|---|---|---|
| Sealant evaporation | –5 to –10 psi in days | Check tire pressure |
| 10°F temperature drop | –1 to –2 psi | Adjust for conditions |
| Hard impacts | Risk of burping | Recheck pressure post-ride |
| Inaccurate pump gauge | False readings | Use digital gauge |
| Increased rolling resistance | Slower, harder ride | Optimize psi weekly |
On a final note
You’ve got this: start with 22–25 psi for trail riding if you’re around 160 lbs, go lower-20–22 psi-for chunky terrain, and bump up to 28 psi on smooth fire roads. Run 2–4 psi lower in the rear for grip, and drop another 2 psi tubeless for fewer burps and better traction. Check pressure weekly with a good gauge, and tweak based on how the bike corners and rebounds. Ride feedback beats any chart.