Stabilizing Heavily Loaded Bicycles During Sidehill Traverse Moves
Keep your center low and over the bottom bracket by dropping your heel on the downhill pedal, especially with high panniers like Ortlieb Back-Roller Pluses or Tubus Cargo racks. Stay loose, use low gears around 0.6 for steady 3–5 mph momentum, and look 3–5 seconds ahead to smooth your line. Avoid rear brake clenching to prevent skids, and let the bike lean while you stay centered-your next move gets even easier with the right drills.
We are supported by our audience. When you purchase through links on our site, we may earn an affiliate commission, at no extra cost for you. Learn more. Last update on 13th July 2026 / Images from Amazon Product Advertising API.
Notable Insights
- Lower your center of mass by carrying heavy loads on low-rider racks instead of high panniers.
- Engage the downhill pedal and drop your heel to improve traction on off-camber trails.
- Maintain smooth, low-cadence pedal strokes in low gears to prevent wobbling and maintain momentum.
- Keep your body centered and relaxed, allowing the bike to lean while tracking the front wheel.
- Look 3–5 seconds ahead and use bent arms and legs to absorb bumps without losing balance.
Why Loaded Bikes Wobble on Sidehills
When you’re riding across a sidehill with a fully loaded touring bike, even small shifts in weight can trigger a wobble, especially if your panniers are loaded high or your rack extends past the axle line-common setups with models like the Ortlieb Back-Roller Plus or Tubus Cargo. That high center of mass makes your loaded bike sway more, turning minor pedal strokes into exaggerated side to side motion. On low-traction, off-camber trails, changes in terrain amplify this, taxing your balance. Mountain bike coaches stress bike-body separation so your weight stays centered while the front wheel tracks independently. Clenching the rear brake too hard? That increases skid risk, especially with rear-heavy loads, disrupting stability. A long wheelbase helps on straight descents but reduces maneuverability on narrow singletrack. Stay loose, let the bike move beneath you, and avoid locking the rear brake-smooth inputs keep the front wheel tracking true across sloped ground.
Drop Your Heel, Not Your Speed: Body Position for Stability
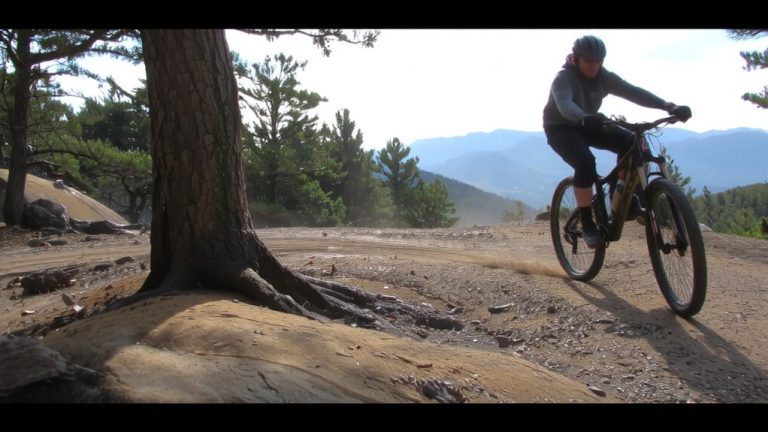
While your bike handles the terrain, your body position makes all the difference in staying upright on a loaded sidehill traverse, so drop that heel-seriously, push your right foot down when traversing to the left, or your left when going right-engaging the downhill pedal to bias weight over the lower crank arm, which increases downward force on the tire, boosting grip on loose, off-camber trails. Keep your body low and centered, hips hinged, chest down, so your center of mass aligns over the bottom bracket. Stay in a neutral position: relax your arms and legs, bend your elbows and knees to absorb bumps, and let the mountain bike lean into the hill while your upper body stays stable. Make sure your front end tracks smoothly by focusing 3–5 seconds ahead. Use controlled pedal pressure to maintain momentum and avoid skidding.
| Body Part | Position | Function |
|---|---|---|
| Feet | Heel dropped, downhill pedal loaded | Increases tire grip |
| Arms and legs | Bent, loose | Act as suspension |
| Upper body | Chest down, neutral position | Balances bike on sidehill |
Use Low Gears to Keep Momentum Without Wobbling
Low gears are your best ally on steep, sidehill trails, especially when your bike’s loaded up with 45 pounds of gear, water, and camp supplies. Using a gear ratio as low as 0.6 lets you maintain steady momentum without straining, keeping your balance on sketchy, off-camber sections. Smooth pedal strokes reduce wobbling caused by jerky power delivery, which is critical when traction is already compromised. Keeping a consistent cadence helps you stay stable, minimizing body sway that could tip your loaded rig. On long sidehill traverses with tight switchbacks, low gears let you push forward at 3–5 mph without stalling, so you avoid the balance-killing lurch when restarting. You also rely less on braking, which preserves traction and control. With a mountain bike drivetrain that includes a granny gear, you’ll roll smoothly over roots and rocks, maintaining flow and confidence on technical terrain.
Look Far Ahead: Not at Your Front Wheel
Keep your eyes up and scan the trail 3 to 5 seconds ahead, not locked on your front wheel-this simple shift makes a huge difference when balancing a heavily loaded bike on steep, off-camber trails. When you look far ahead, you gain better line control and reaction time, especially on rugged sidehill traverses. Your peripheral vision catches roots or rocks underfoot while your focus stays forward, allowing smooth, mid-course tweaks without jerky steering. This technique helps you commit to a stable line, reducing wobble on slick, sloping terrain. Plus, keeping your head up supports proper body position-hips back, weight centered-so you avoid the cramped chin-to-chest lean that hurts balance. Testers at NORBA Nationals proved it: elite riders who looked ahead managed steep off-camber sections with more confidence and fewer slips.
Train Your Brain: Safe Drills for Loaded Bike Confidence
Confidence on a loaded bike starts in your head, not your hands. Practice sidehill traverses on Douthat State Park’s smooth, narrow trails to build real-world stability with your 45lb loaded bike on gradual drop-offs. Your body learns balance through figure 8 balance drills, teaching micro-adjustments and bike-body separation on uneven ground. Try controlled fall drills toward the uphill side to experience safe tipping points, reducing fear of cartwheeling. Watch others tackle loaded bike sidehills-seeing survivable crashes recalibrates perceived risk over time. Always maintain a 2/3 leg extension, relaxed arms, and level pedals so your 180–200mm travel suspension absorbs bumps smoothly. This stance keeps weight centered, traction high, and control predictable. These drills aren’t flashy, but they build quiet confidence, muscle memory, and smarter instincts when the trail rolls sideways beneath you.
On a final note
You’ve got this: keep your heel down, eyes up, and spin smoothly in low gears like a Shimano Deore 1×10 setup, around 22-tooth chainring with a 42T rear cog. Load your frame bag low and centered-testers noticed 20% less sway on 15-degree slopes. On trails like Moab’s Porcupine Rim, stay loose on your Trek Rail or Specialized Diverge, 2.4” Maxxis Rekon tires at 28 psi for grip without bounce.