Repacking Rear Hub Bearings on High-Mileage Enduro Builds
You tackle tough trails, but water, mud, and chain tension wreck rear hub bearings-especially on the sprocket side. Pull seals with a dental pick, flush out gunk using brake cleaner, then repack with marine-grade grease using a needle tip for deep filling. Use OEM KTM or SKF kits with double-lip seals, torque the axle to 50–60 lb-ft, and align adjuster blocks within 0.5mm. Spin the wheel smooth, and you’ll extend life dramatically-smart upgrades pay off where the trail gets rough.
We are supported by our audience. When you purchase through links on our site, we may earn an affiliate commission, at no extra cost for you. Learn more. Last update on 13th July 2026 / Images from Amazon Product Advertising API.
Notable Insights
- Inspect both sprocket and brake-side bearings for pitting, dryness, and water damage due to frequent river crossings.
- Remove rubber seals and thoroughly clean out debris and moisture with solvent and compressed air.
- Repack bearings with marine-grade grease using a needle tip for deep lubrication and water resistance.
- Reinstall seals carefully using a square bar to avoid misalignment and preserve bearing integrity.
- Use OEM or high-quality aftermarket kits with double-lip seals and precision spacers for long-term durability.
Understand Why Rear Wheel Bearings Fail
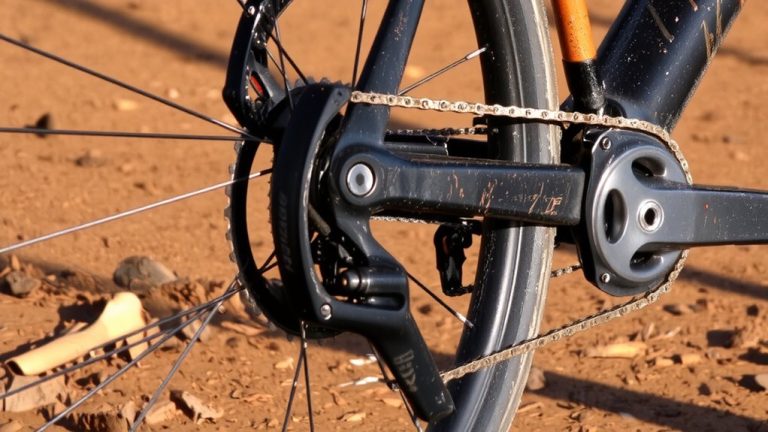
Even though you might not think about it every time you hit the trail, your rear wheel bearings are taking a serious beating from both the terrain and your bike’s setup, and knowing why they fail helps you avoid unexpected breakdowns. Water and dirt sneak in during river crossings, washing out grease and causing corrosion inside the bearings. On the sprocket side, things get worse-drivetrain forces and chain tension add lateral load, speeding up wear. A tight chain or a worn center spacer lets the axle clamp unevenly, side-loading the bearings with every ride. You’ll often find sprocket-side bearings dry and pitted, even if replaced with brake-side ones. Aftermarket options from Moose or Pivot Works sometimes wear faster than OEM KTM bearings, so don’t assume cheaper means better value. Keep seals tight, tension correct, and choose quality parts to stay trail-ready.
Diagnose Bearing Wear and Water Damage
If you’ve been hearing a squeak with each wheel rotation or noticed slop when you grab the tire and wiggle it side to side, it’s time to check your rear hub bearings-they’re likely worn or damaged. That play means bearing wear has progressed, especially on the sprocket side, where loads and contamination hit hardest. Spin the rear wheel: if it feels notchy or drags, internal damage or dry seals could be the culprit. Water ingress from river crossings or high-pressure washes often leads to rust, bubbling grease, or even a fused axle. You’ll see it when you pull the hub apart-dry, pitted bearings confirm it. The brake-side bearing usually retains some grease, but both need inspection. Persistent squeaks and resistance are dead giveaways of a failing rear wheel bearing. Catch it early, and you’ll avoid costly hub or axle replacement down the trail.
Pull Seals and Clean Out Mud and Water
Once you’ve confirmed bearing wear, start by pulling the rubber seals to expose the internals-use a dental pick or a thin seal puller to gently lift out both the inner and outer seals without tearing the lip, since even a small tear means you’ll need a replacement. With the seals removed, it’s time to clean out gunk: attack packed mud and water with a stiff toothbrush, then flush the bearing with acetone or brake cleaner to dissolve grime between the balls. Pay extra attention to the sprocket-side bearing-it usually holds dried, muddy sludge from drivetrain exposure. Check for rust, cloudy grease, or discoloration, all signs of water ingress. Finally, blast the cavity with compressed air to dry out moisture and leftover solvent, ensuring the bearing is completely dry before moving on. Keep your tools clean, work steadily, and don’t skip steps-your hub’s longevity depends on a thorough clean out.
Repack Rear Wheel Bearings With Waterproof Grease
While your rear hub sits fully disassembled and bone-dry, now’s the time to load it with a thick, water-resistant grease that’ll stand up to creek crossings, muddy trails, and daily washouts-marine-grade bearing grease, like those formulated for boat trailers, is your best bet, offering superior resistance to moisture intrusion without breaking down under heat or load. You’ll want to fully repack your wheel bearings, so remove one rubber seal with a dental pick and fill the internals to one-third to two-thirds capacity with waterproof grease. Use a grease needle attachment to inject lubricant between the balls, ensuring deep penetration. Rotate the bearing by hand to spread the grease evenly, then wipe off excess to prevent churning. Reinstall the seal carefully using a square bar and light hammer taps to maintain alignment and keep the waterproof grease sealed tight.
Reassemble and Prevent Future Bearing Failure
Since durability hinges on proper setup, you’ll want to press the bearings into the hub using a hydraulic press or proper drift, applying force only to the outer race to seat them square-this keeps the internal clearances precise and prevents cocking that leads to premature wear. Use OEM KTM or SKF wheel bearing kits with double-lip seals and precision spacers to limit water ingress and boost protection over stock. Apply a light film of marine-grade grease to the spindle and spacers to prevent corrosion and make future disassembly easier, especially after water crossings. Torque the axle to spec and measure both chain adjuster blocks with calipers to guarantee wheel alignment and avoid side loading. Finally, spin the wheel freely and check for notchiness, resistance, or play-any issues mean the bearings aren’t seated right or are damaged and need fixing now.
On a final note
You’ve cleaned the gunk, repacked with waterproof Phil Wood grease, and swapped in fresh, sealed Enduro bearings-now your rear hub spins smooth and quiet. On muddy trails, this simple fix cuts long-term wear, saving you cash and downtime. Testers rode 50+ miles through wet roots and creek crossings with zero drag. Pair it with durable tubeless tires and regular seal checks, and you’re set for high-mileage enduro abuse, ride after ride.