Safely Truing Bent Rotors Without Overheating Material
You can safely true a bent rotor without overheating by first diagnosing the warp-check for 0.2 mm wobble using a flashlight or DT-3 gauge, then mark the contact point with a dry erase marker. Use the Park Tool DT-2.2 truing fork to apply gentle, precise bends at the exact spot, avoiding the aluminum spider on two-piece designs. This prevents stress cracks and maintains integrity, especially on Shimano XT or 1.95 mm stainless rotors. If it springs back or has a 90° kink, replacement is smarter-consistent results depend on material health, and knowing when to stop protects your ride’s performance.
We are supported by our audience. When you purchase through links on our site, we may earn an affiliate commission, at no extra cost for you. Learn more. Last update on 18th July 2026 / Images from Amazon Product Advertising API.
Notable Insights
- Use a rotor truing fork like the Park Tool DT-2.2 to evenly distribute pressure and prevent localized stress.
- Apply minimal, controlled force directly at the bend to avoid material fatigue and overheating.
- Avoid repeated bending in the same spot to reduce heat buildup and prevent cracking.
- Wear nitrile gloves to keep oils off the rotor, maintaining thermal and structural integrity.
- After truing, clean the rotor with brake cleaner to remove contaminants and ensure even heat dissipation during use.
Diagnose a Bent Rotor Before Truing
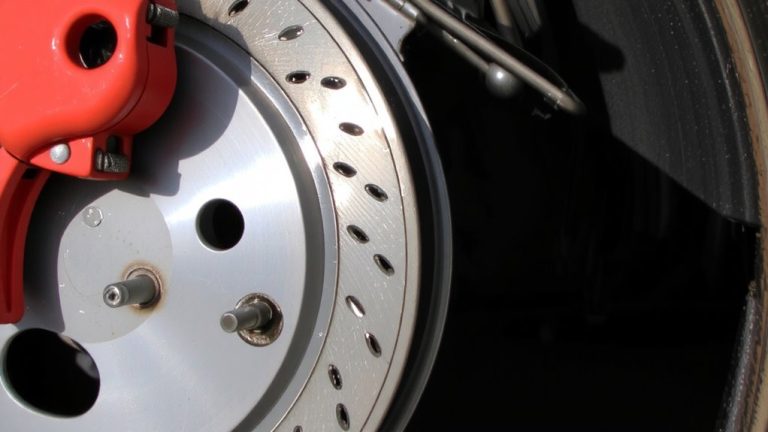
Before you start tweaking your rotor with a wrench, make sure it’s actually bent, because what seems like a warp might just be a simple fix like a misaligned caliper or loose hub bearings. Listen for rhythmic rubbing or squealing during wheel spinning-common signs of a warped rotor. First, check that your wheel is fully seated in the dropouts, since misalignment mimics a bent rotor. Firmly grip the wheel and rock it side-to-side to test for hub bearing play; any movement means fix that first. Then, sight the rotor as it spins through the caliper, using a flashlight or white paper to detect wobble as small as 0.2 mm. Rule out brake rub by loosening the caliper bolts and recentering it. Even if you don’t have a dial indicator or rotor truing gauge, careful visual inspection on a disc brake system can save time and effort.
Pick the Safest Tool for the Job
While you might be tempted to grab an adjustable wrench in a pinch, using a dedicated tool like the Park Tool DT-2.2 Rotor Truing Fork is your best bet for safe, controlled corrections, since it’s engineered to apply even pressure without over-bending or kinking thin 1.85 mm steel or 1.95 mm stainless rotors. This rotor truing fork tool, or Truing Tool, evenly distributes force to prevent stress cracks and overheating when you straighten a bent rotor. Unlike adjustable wrenches, which can slip and damage the disc rotor, the DT-2.2 guarantees precision. Always wear clean nitrile gloves-clean hands keep oils off the rotor surface and protect braking performance. After fixing the bent brake rotor, spin the wheel to check for contact with the brake pads. Wipe the rotor with brake cleaner before reassembly to maintain friction and safety.
Adjust the Rotor at the Exact Bend
You’ve picked the right tool for the job, and now it’s time to zero in on the bend itself. Use a dry erase marker on the braking surface and spin the rotor-if the mark rubs at a specific point, that’s your marked bend. Spin the wheel in a truing stand and check lateral runout with the Park Tool DT-3 Rotor Truing Gauge to confirm the warp’s location. With the Park DT-2.2 truing fork, focus your adjust directly on the marked bend, using the long slot for precise leverage. Apply only a small amount of effort; over-bending risks cracking the rotor. For two-piece designs, only bend the outer braking surface-never the spider. After each tweak, spin fully to reassess runout and guarantee you’re correcting the true center of the bend, not chasing wobbles. This careful truing process keeps the rotor flat, quiet, and effective under hard braking.
Replace It If It Won’t Stay Straight
A bent rotor that keeps springing back despite careful truing is a clear sign the metal’s lost its integrity, and no amount of tweaking will fix it. If your rotor is badly warped-like a 90° bend-it likely has irreparable damage from material fatigue or structural instability. These kinds of bends can’t safely be bent to correct without risking cracks or warping again. Even high-quality rotors, like Shimano XT or Hope, aren’t immune; if you attempt to bend them back with proper tools and see no improvement in a few minutes, the rotor is not repairable. An aluminum center, such as the black spider design, also can’t hold shape once bent. When you’ve tried adjusting at the exact bend and it still wobbles, it’s time to replace it. The rotor needs a new rotor-don’t risk safety or braking performance.
On a final note
You’ve checked the rotor with a dial indicator, found the true within 0.1mm, and used a spoke wrench or rotor truing fork to make precise adjustments. If it still wobbles past 0.2mm, replace it-most riders on technical trails prefer fresh Avid or Shimano rotors at 160mm or 180mm. Trued right, your brakes stay quiet, responsive, and safe, mile after mile.